Canon FS100 FS10/FS11/FS100 Instruction Manual - Page 46
Manual Focus Adjustment - video to windows 8
 |
UPC - 013803092530
View all Canon FS100 manuals
Add to My Manuals
Save this manual to your list of manuals |
Page 46 highlights
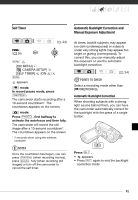
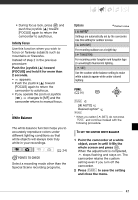
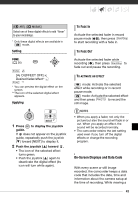
Video Manual Exposure Adjustment Manual Focus Adjustment 1 Press guide. to display the joystick If [EXP] does not appear on the joystick guide, repeatedly push the joystick ( ) toward [NEXT] to display it. 2 Push the joystick ( ) toward [EXP]. The exposure adjustment indicator and the neutral value [±0] appear on the screen. 3 Adjust the ( ) the brightness of the image as required. The adjustment range and the length of the exposure adjustment indicator will vary depending on the initial brightness of the picture. 4 Press . • The exposure adjustment indicator will change to white and the exposure will be locked. • If you operate the zoom lever during exposure lock, the brightness of the image may change. • During exposure lock, press and push the joystick ( ) toward [EXP] again to return the camcorder to automatic exposure. Autofocus may not work well on the following subjects. In such case, focus manually. • Reflective surfaces • Subjects with low contrast or without vertical lines • Fast moving subjects • Through wet windows • Night scenes ( 24) POINTS TO CHECK Adjust the zoom ( 33) before you start the procedure. 1 Press guide. to display the joystick If [FOCUS] does not appear on the joystick guide, repeatedly push the joystick ( ) toward [NEXT] to display it. 2 Push the joystick ( ) toward [FOCUS]. [MF] appears. 3 Adjust ( ) the focus as necessary. Pushing the joystick ( ) toward [FOCUS] again will return the camcorder to autofocus. 4 Press . • The focus will be locked. 46
-
 1
1 -
2
-
3
-
4
-
5
-
6
-
7
-
8
-
9
-
10
-
11
-
12
-
13
-
14
-
15
-
16
-
17
-
18
-
19
-
20
-
21
-
22
-
23
-
24
-
25
-
26
-
27
-
28
-
29
-
30
-
31
-
32
-
33
-
34
-
35
-
36
-
37
-
38
-
39
-
40
-
 41
41 -
 42
42 -
 43
43 -
 44
44 -
 45
45 -
 46
46 -
 47
47 -
 48
48 -
 49
49 -
 50
50 -
 51
51 -
52
-
53
-
54
-
55
-
56
-
57
-
58
-
59
-
60
-
61
-
62
-
63
-
64
-
65
-
66
-
67
-
68
-
69
-
70
-
71
-
72
-
73
-
74
-
75
-
76
-
77
-
78
-
79
-
80
-
81
-
82
-
83
-
84
-
85
-
86
-
87
-
88
-
89
-
90
-
91
-
92
-
93
-
94
-
95
-
96
-
97
-
98
-
99
-
100
-
101
-
102
-
103
-
104
-
105
-
106
-
107
-
108
-
109
-
110
 |
 |
