Canon FS200 FS20/FS21/FS22/FS200 Instruction Manual - Page 79
Press the start button on the DVD, burner.
 |
UPC - 013803108828
View all Canon FS200 manuals
Add to My Manuals
Save this manual to your list of manuals |
Page 79 highlights
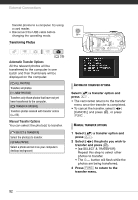
4 Press the start button on the DVD burner. • A progress bar will be displayed on the screen. • After pressing the start button (while the current disc is being written) the operation cannot be canceled. • When the disc (or the last disc, if the data requires multiple discs) is finalized, [TASK COMPLETED] will be displayed. Take out the disc and close the disc tray. WHEN THE DATA REQUIRES MULTIPLE DISCS After a disc is finalized it will be ejected automatically and [INSERT A NEW/ BLANK DISC AND CLOSE THE DISC TRAY] will appear. Insert the next disc and close the disc tray. TO CREATE AN ADDITIONAL COPY OF THE SAME DISC After the operation is finished, [INSERT A NEW/BLANK DISC] will be displayed again. Insert a brand new disc and close the disc tray. TO PLAY BACK A DVD DISC Discs created with this camcorder and the DVD burner can be played back on DVD players and computers that meet the following requirements: • Compatible with the discs you created (DVD-R/DVD-R DL/DVD-RW discs) • Compatible with DVD-Video specifications • DVD playback software that is installed and running (in the case of computers) Refer to the instruction manual of the external device and make sure it is compatible. IMPORTANT • While the camcorder is connected to the DVD burner, do not open the memory card slot cover and do not remove the memory card. • Observe the following precautions while the ACCESS indicator on the camcorder is on or flashing. Failing to do so may result in permanent data loss. - Do not open the memory card slot cover. - Do not disconnect the USB cable. - Do not disconnect the power source or turn off the camcorder or the DVD burner. • When creating discs with the optional DW-100 DVD Burner, you cannot add, using the [PLAYLIST] option, scenes recorded while the pre-recording function was on or divided scenes. To add such scenes, use the [ALL SCENES] or [REM.SCENES] option. • For important information on handling your discs, refer to Cautions on handling. NOTES • The FUNC. menu and setup menus cannot be accessed while the camcorder is connected to the DVD burner. • Disconnect the USB cable before changing the operating mode. • The amount of time required for step 2 depends on how many scenes are being included on a disc. We recommend keeping the number of scenes to 2000 79
-
 1
1 -
2
-
3
-
4
-
5
-
6
-
7
-
8
-
9
-
10
-
11
-
12
-
13
-
14
-
15
-
16
-
17
-
18
-
19
-
20
-
21
-
22
-
23
-
24
-
25
-
26
-
27
-
28
-
29
-
30
-
31
-
32
-
33
-
34
-
35
-
36
-
37
-
38
-
39
-
40
-
41
-
42
-
43
-
44
-
45
-
46
-
47
-
48
-
49
-
50
-
51
-
52
-
53
-
54
-
55
-
56
-
57
-
58
-
59
-
60
-
61
-
62
-
63
-
64
-
65
-
66
-
67
-
68
-
69
-
70
-
71
-
72
-
73
-
 74
74 -
 75
75 -
 76
76 -
 77
77 -
 78
78 -
 79
79 -
 80
80 -
 81
81 -
 82
82 -
 83
83 -
 84
84 -
85
-
86
-
87
-
88
-
89
-
90
-
91
-
92
-
93
-
94
-
95
-
96
-
97
-
98
-
99
-
100
-
101
-
102
-
103
-
104
-
105
-
106
-
107
-
108
-
109
-
110
-
111
-
112
-
113
-
114
-
115
-
116
-
117
-
118
-
119
-
120
-
121
-
122
-
123
 |
 |
