Canon HV20 HV20 Instruction Manual - Page 60
Self Timer, Audio Recording Level
 |
UPC - 013803083200
View all Canon HV20 manuals
Add to My Manuals
Save this manual to your list of manuals |
Page 60 highlights
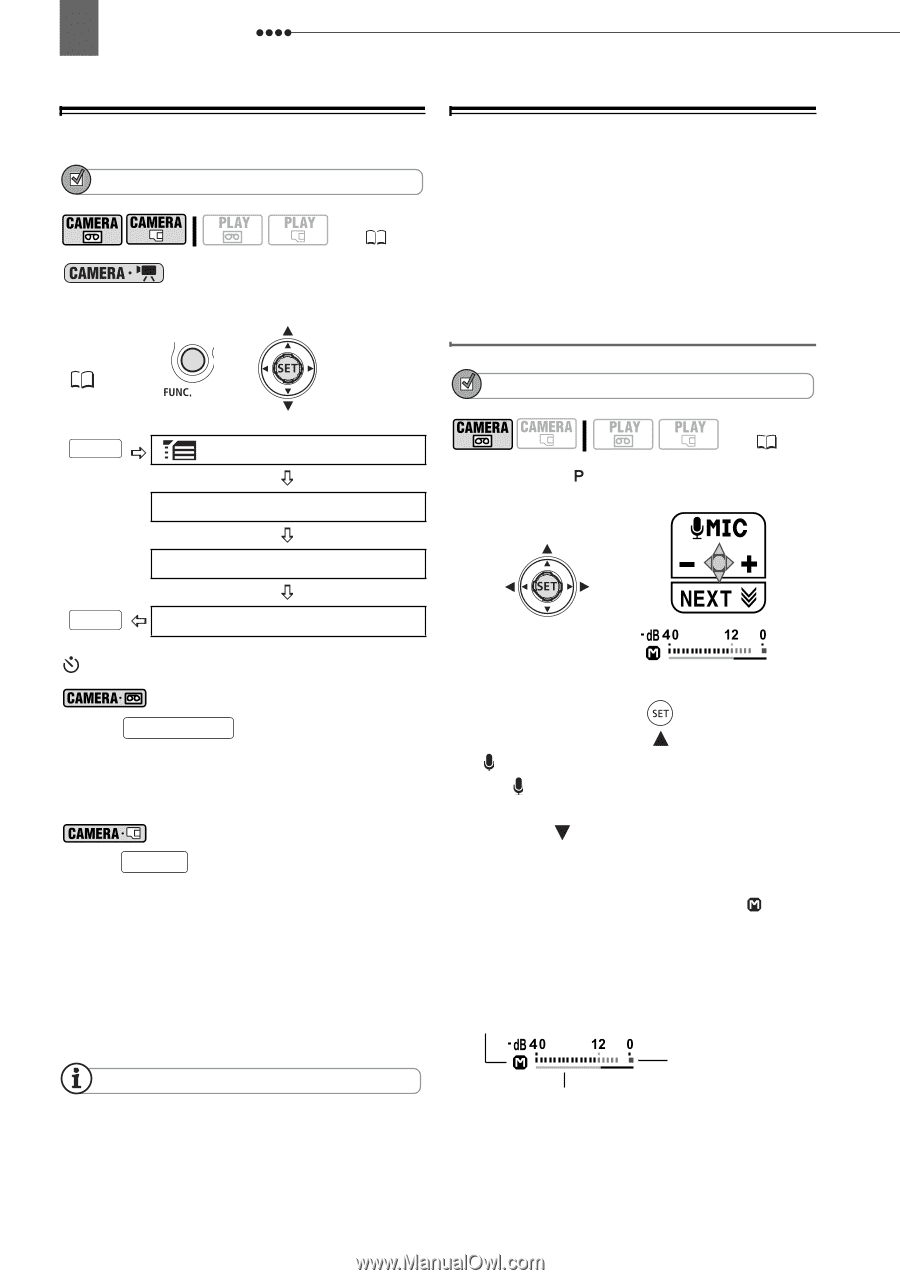
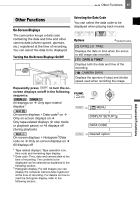
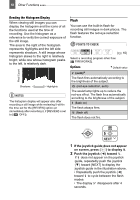
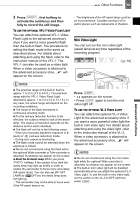
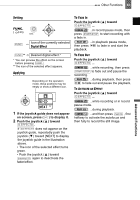
60 Other Functions Self Timer POINTS TO CHECK ( 10) : Set the camcorder in record pause mode. FUNC. ( 23) Audio Recording Level You can adjust the audio recording level for the built-in or for an external microphone. You can display the audio level indicator while recording or playing back the tape. Manual Adjustment of the Audio Recording Level POINTS TO CHECK FUNC. MENU CAMERA SETUP Mode switch: ( 10) SELF TIMER FUNC. ON appears. : Press START/STOP . The camcorder starts recording after a 10-second countdown*. The countdown appears on the screen. : Press PHOTO , first halfway to activate the autofocus and then fully to record the still image. The camcorder will record the still image after a 10-second countdown*. The countdown appears on the screen. * 2 seconds when using the wireless controller. NOTES Once the countdown has begun, you can cancel the self timer by turning off the camcorder. 1 If the joystick guide does not appear on screen, press ( ) to display it. 2 Push the joystick ( ) toward [ MIC]. • If [ MIC] does not appear on the joystick guide, repeatedly push the joystick ( ) toward [NEXT] to display the joystick guide in the illustration above. • The manual adjustment icon will appear to the left of the audio level indicator and the manual adjustment bar (green) will appear below it. Manual audio level adjustment Audio level indicator Audio level adjustment bar
-
 1
1 -
2
-
3
-
4
-
5
-
6
-
7
-
8
-
9
-
10
-
11
-
12
-
13
-
14
-
15
-
16
-
17
-
18
-
19
-
20
-
21
-
22
-
23
-
24
-
25
-
26
-
27
-
28
-
29
-
30
-
31
-
32
-
33
-
34
-
35
-
36
-
37
-
38
-
39
-
40
-
41
-
42
-
43
-
44
-
45
-
46
-
47
-
48
-
49
-
50
-
51
-
52
-
53
-
54
-
 55
55 -
 56
56 -
 57
57 -
 58
58 -
 59
59 -
 60
60 -
 61
61 -
 62
62 -
 63
63 -
 64
64 -
 65
65 -
66
-
67
-
68
-
69
-
70
-
71
-
72
-
73
-
74
-
75
-
76
-
77
-
78
-
79
-
80
-
81
-
82
-
83
-
84
-
85
-
86
-
87
-
88
-
89
-
90
-
91
-
92
-
93
-
94
-
95
-
96
-
97
-
98
-
99
-
100
-
101
-
102
-
103
-
104
-
105
-
106
-
107
-
108
 |
 |