Canon I9100 i9100 Quick Start Guide - Page 24
Print Head Maintenance - print head replacement
 |
View all Canon I9100 manuals
Add to My Manuals
Save this manual to your list of manuals |
Page 24 highlights
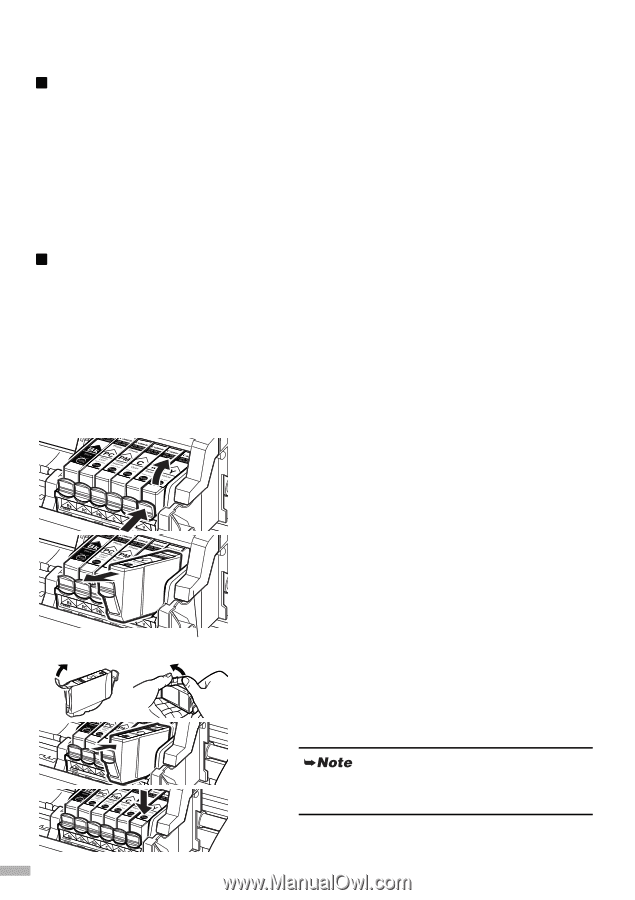
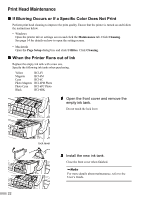
Print Head Maintenance „ If Blurring Occurs or If a Specific Color Does Not Print Perform print head cleaning to improve the print quality. Ensure that the printer is turned on and follow the instructions below. • Windows Open the printer driver settings screen and click the Maintenance tab. Click Cleaning. See page 14 for details on how to open the setting screen. • Macintosh Open the Page Setup dialog box and click Utilities. Click Cleaning. „ When the Printer Runs out of Ink Replace the empty ink tank with a new one. Specify the following ink tanks when purchasing. Yellow BCI-6Y Magenta BCI-6M Cyan BCI-6C Photo Magenta BCI-6PM Photo Photo Cyan BCI-6PC Photo Black BCI-6BK 1 Open the front cover and remove the empty ink tank. Do not touch the lock lever. lock lever 2 Install the new ink tank. Close the front cover when finished. For more details about maintenance, refer to the User's Guide. 22
-
 1
1 -
2
-
3
-
4
-
5
-
6
-
7
-
8
-
9
-
10
-
11
-
12
-
13
-
14
-
15
-
16
-
17
-
18
-
 19
19 -
 20
20 -
 21
21 -
 22
22 -
 23
23 -
 24
24 -
 25
25 -
 26
26 -
 27
27 -
 28
28
 |
 |