Canon LV-X7 LV User's Manual - Page 33
Projecting an Image Basic Operation
 |
View all Canon LV-X7 manuals
Add to My Manuals
Save this manual to your list of manuals |
Page 33 highlights
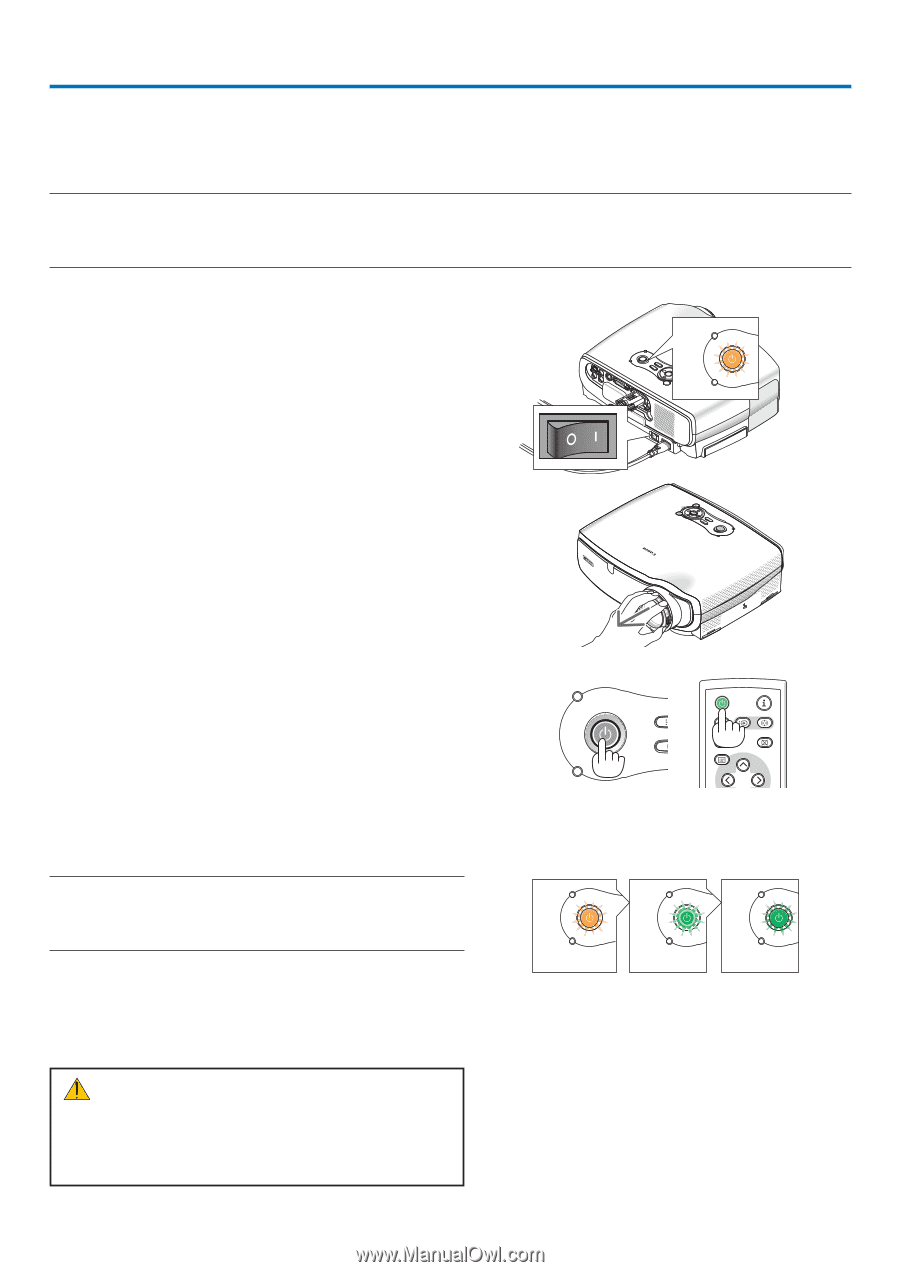
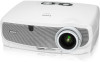
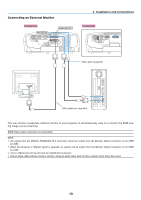
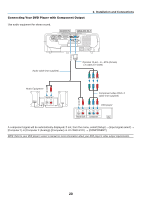
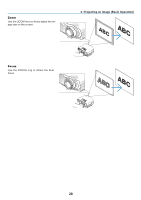
3. Projecting an Image (Basic Operation) This section describes how to turn on the projector and to project a picture onto the screen. ❶ Turning on the Projector NOTE: • The projector has two power switches: a main power switch and a POWER button. • When plugging in or unplugging the supplied power cord, make sure that the main power switch is pushed to the off () po- sition. Failure to do so may cause damage to the projector. 1. To turn on the main power to the projector, press the Main Power switch to the on position ( I ). WARNING • The POWER indicator will light orange. LAMP See the Power Indicator section on page 61 for more details. 2. Remove the lens cap. +VOL BACK MENU KEYSTONE AUTO PC INPUT -VOL R LAMP WARNING POWE 3. Press the POWER button on the projector cabinet or the POWER button on the remote control for about 1 second. The POWER indicator will turn to green and the projector will become ready to use. After you turn on your projector, ensure that the computer or video source is turned on and that your lens cap is removed. NOTE: If you turn on the projector immediately after the lamp is turned off or when the temperature is high, the fans runs without displaying an image for some time and then the projector will display the image. WARNING POWER LAMP INPUT AUTO PC POWER INFO. MENU IMAGE INPUT AUTO PC ASPECT VOL M-ENU NO SHOW VOL + KEYSTONE BACK Standby WARNING Blinking WARNING Power On WARNING LAMP LAMP LAMP S t e a d y o r- Blinking Steady ange light green light green light See page 61 for more details. CAUTION: The projector cannot be turned off for 60 seconds after the lamp is turned on and while the POWER indicator is blinking green. Doing so could cause premature lamp failure. 24
-
 1
1 -
2
-
3
-
4
-
5
-
6
-
7
-
8
-
9
-
10
-
11
-
12
-
13
-
14
-
15
-
16
-
17
-
18
-
19
-
20
-
21
-
22
-
23
-
24
-
25
-
26
-
27
-
 28
28 -
 29
29 -
 30
30 -
 31
31 -
 32
32 -
 33
33 -
 34
34 -
 35
35 -
 36
36 -
 37
37 -
 38
38 -
39
-
40
-
41
-
42
-
43
-
44
-
45
-
46
-
47
-
48
-
49
-
50
-
51
-
52
-
53
-
54
-
55
-
56
-
57
-
58
-
59
-
60
-
61
-
62
-
63
-
64
-
65
-
66
-
67
-
68
-
69
-
70
-
71
-
72
-
73
-
74
-
75
-
76
-
77
-
78
-
79
-
80
-
81
-
82
-
83
 |
 |