Canon PIXMA MX472 Printing Guide - Page 72
Setting the Print Quality Level Custom, Specifying Color Correction, Adjusting Color Balance,
 |
View all Canon PIXMA MX472 manuals
Add to My Manuals
Save this manual to your list of manuals |
Page 72 highlights
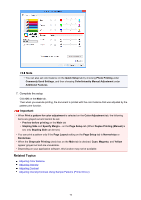
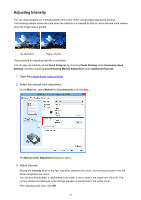
4. Complete the setup Click OK on the Main tab. When you execute print, the data is printed at the specified brightness. Related Topics Setting the Print Quality Level (Custom) Specifying Color Correction Adjusting Color Balance Adjusting Intensity Adjusting Contrast 72
-
 1
1 -
2
-
3
-
4
-
5
-
6
-
7
-
8
-
9
-
10
-
11
-
12
-
13
-
14
-
15
-
16
-
17
-
18
-
19
-
20
-
21
-
22
-
23
-
24
-
25
-
26
-
27
-
28
-
29
-
30
-
31
-
32
-
33
-
34
-
35
-
36
-
37
-
38
-
39
-
40
-
41
-
42
-
43
-
44
-
45
-
46
-
47
-
48
-
49
-
50
-
51
-
52
-
53
-
54
-
55
-
56
-
57
-
58
-
59
-
60
-
61
-
62
-
63
-
64
-
65
-
66
-
 67
67 -
 68
68 -
 69
69 -
 70
70 -
 71
71 -
 72
72 -
 73
73 -
 74
74 -
 75
75 -
 76
76 -
 77
77 -
78
-
79
-
80
-
81
-
82
-
83
-
84
-
85
-
86
-
87
-
88
-
89
-
90
-
91
-
92
-
93
-
94
-
95
-
96
-
97
-
98
-
99
-
100
-
101
-
102
-
103
-
104
-
105
-
106
-
107
-
108
-
109
-
110
-
111
-
112
-
113
-
114
-
115
-
116
-
117
-
118
-
119
-
120
-
121
-
122
-
123
-
124
-
125
-
126
-
127
-
128
-
129
-
130
-
131
-
132
-
133
-
134
-
135
-
136
-
137
-
138
-
139
-
140
-
141
-
142
-
143
-
144
-
145
-
146
-
147
-
148
-
149
-
150
-
151
-
152
-
153
-
154
-
155
-
156
-
157
-
158
-
159
-
160
-
161
 |
 |
4.
Complete the setup
Click
OK
on the
Main
tab.
When you execute print, the data is printed at the specified brightness.
Related Topics
Setting the Print Quality Level (Custom)
Specifying Color Correction
Adjusting Color Balance
Adjusting Intensity
Adjusting Contrast
72