Canon PIXMA iP2820 Printing Guide - Page 132
Installing the Printer Driver - driver download
 |
View all Canon PIXMA iP2820 manuals
Add to My Manuals
Save this manual to your list of manuals |
Page 132 highlights
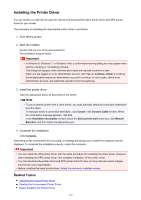
Installing the Printer Driver You can access our web site through the Internet and download the latest printer driver and XPS printer driver for your model. The procedure for installing the downloaded printer driver is as follows: 1. Turn off the printer 2. Start the installer Double-click the icon of the downloaded file. The installation program starts. Important • In Windows 8, Windows 7, or Windows Vista, a confirmation/warning dialog box may appear when starting, installing or uninstalling software. This dialog box appears when administrative rights are required to perform a task. When you are logged on to an administrator account, click Yes (or Continue, Allow) to continue. Some applications require an administrator account to continue. In such cases, switch to an administrator account, and restart the operation from the beginning. 3. Install the printer driver Take the appropriate action as described on the screen. Note • To use a network printer from a client printer, you must manually select the connection destination from the client. To manually select a connection destination, click Cancel in the Connect Cable window. When the confirmation message appears, click Yes. In the Installation Incomplete window, select the Select printer port check box, click Manual Selection, and then select the appropriate port. 4. Complete the installation Click Complete. Depending on the environment you are using, a message prompting you to restart the computer may be displayed. To complete the installation properly, restart the computer. Important • You can install the XPS printer driver with the same procedure for installing the printer driver. However, when installing the XPS printer driver, first complete installation of the printer driver. • You can download the printer driver and XPS printer driver for free, but any Internet access charges incurred are your responsibility. • Before installing the latest printer driver, delete the previously installed version. Related Topics Obtaining the Latest Printer Driver Deleting the Unnecessary Printer Driver Before Installing the Printer Driver 132
-
 1
1 -
2
-
3
-
4
-
5
-
6
-
7
-
8
-
9
-
10
-
11
-
12
-
13
-
14
-
15
-
16
-
17
-
18
-
19
-
20
-
21
-
22
-
23
-
24
-
25
-
26
-
27
-
28
-
29
-
30
-
31
-
32
-
33
-
34
-
35
-
36
-
37
-
38
-
39
-
40
-
41
-
42
-
43
-
44
-
45
-
46
-
47
-
48
-
49
-
50
-
51
-
52
-
53
-
54
-
55
-
56
-
57
-
58
-
59
-
60
-
61
-
62
-
63
-
64
-
65
-
66
-
67
-
68
-
69
-
70
-
71
-
72
-
73
-
74
-
75
-
76
-
77
-
78
-
79
-
80
-
81
-
82
-
83
-
84
-
85
-
86
-
87
-
88
-
89
-
90
-
91
-
92
-
93
-
94
-
95
-
96
-
97
-
98
-
99
-
100
-
101
-
102
-
103
-
104
-
105
-
106
-
107
-
108
-
109
-
110
-
111
-
112
-
113
-
114
-
115
-
116
-
117
-
118
-
119
-
120
-
121
-
122
-
123
-
124
-
125
-
126
-
 127
127 -
 128
128 -
 129
129 -
 130
130 -
 131
131 -
 132
132 -
 133
133 -
 134
134 -
 135
135 -
 136
136 -
 137
137 -
138
 |
 |