Canon VB-S30D User Manual - Page 52
FTP Upload, Proxy User Name], [Proxy Password]
 |
View all Canon VB-S30D manuals
Add to My Manuals
Save this manual to your list of manuals |
Page 52 highlights
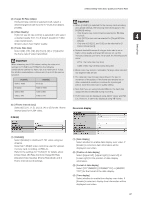
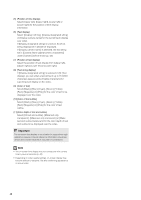
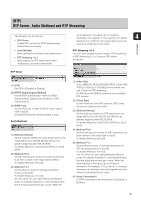
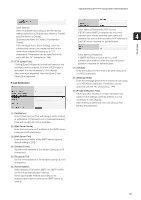
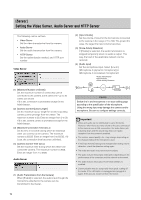
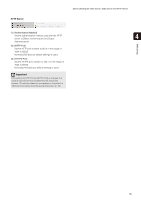
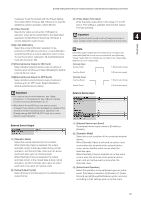
- From the Intelligent Function Setting Tool [Event] tab > disable [ON Event Operation], [OFF Event Operation] or [Detected mode Operation] (p. 104). - If [External Device Input Event] is enabled, disable [Active Event Operation], [Inactive Event Operation], or [Ongoing Active Event Operation] (p. 57). - If [Timer Event] is enabled, increase the value in [Repeat Interval] (p. 58). HTTP Upload The HTTP upload function sends notifications via HTTP or via HTTP with attached videos, depending on the network camera event. Important • Enter [Proxy Server], [Proxy Port], [Proxy User Name] and [Proxy Password] if connecting via a proxy. • For information about the HTTP upload function and settings, contact your nearest Canon Customer Service Center. FTP Upload (1) [Notification] Select [Notification Only with HTTP] or [Video attached Notification with HTTP] as the content of notification. (2) [URI] Enter the URI to be uploaded to (using up to 255 characters). (3) [User Name], [Password] Enter the user name and password required for authentication. Digest authentication is not supported. (4) [Proxy Server] Enter the host name or IP address of the proxy server (using up to 63 characters). (5) [Proxy Port] Enter the port number of the proxy server (factory default setting is [80]). (6) [Proxy User Name], [Proxy Password] Enter the user name and password of the proxy server. Digest authentication is not supported. (7) [Parameter (query string)] Enter the parameter (using up to 127 characters). Parameters can be specified using the "%" character (p. 144). (8) [HTTP Upload Test] Clicking [Exec] initiates an upload test based on the settings currently entered. Only one JPEG image is uploaded. It is not necessary to click [Apply]. After entering a password, first click [Exec], then [Apply] the password. (1) [Notification] The content of notification is set to [Video data upload with FTP]. (2) [FTP Server] Enter the host name or IP address of the FTP server (using up to 63 characters). (3) [User Name], [Password] Enter the user name and password required for authentication. (4) [PASV Mode] Select [Disable] or [Enable] for the PASV mode when uploading via FTP. (5) [File Upload Path] Enter the path to the folder where the video file is to be uploaded to (using up to 255 characters). (6) [File Naming] Set a desired file naming rule. [YYYYMMDDHHMMSSms] Video is uploaded according to the file name format of "{year}{month}{day}{hour}{minute}{second}{ms}.jpg". (Example: 20130123112122000.jpg) [YYYYMMDD Directory/HHMMSSms] A subdirectory named "{year}{month}{day}" is created first, and then the video is uploaded using the file name "{hour}{minute}{second}{ms}.jpg". (Example: 20130123/112122000.jpg) [Loop] Video is loaded with a file name numbered up to the value set in [Maximum Number of Loops]. (Example: 0000.jpg, 0001.jpg) [Maximum Number of Loops] If [Loop] is set under [File Naming], enter the maximum number of loops in the range of 0 to 9999. 52
-
 1
1 -
2
-
3
-
4
-
5
-
6
-
7
-
8
-
9
-
10
-
11
-
12
-
13
-
14
-
15
-
16
-
17
-
18
-
19
-
20
-
21
-
22
-
23
-
24
-
25
-
26
-
27
-
28
-
29
-
30
-
31
-
32
-
33
-
34
-
35
-
36
-
37
-
38
-
39
-
40
-
41
-
42
-
43
-
44
-
45
-
46
-
 47
47 -
 48
48 -
 49
49 -
 50
50 -
 51
51 -
 52
52 -
 53
53 -
 54
54 -
 55
55 -
 56
56 -
 57
57 -
58
-
59
-
60
-
61
-
62
-
63
-
64
-
65
-
66
-
67
-
68
-
69
-
70
-
71
-
72
-
73
-
74
-
75
-
76
-
77
-
78
-
79
-
80
-
81
-
82
-
83
-
84
-
85
-
86
-
87
-
88
-
89
-
90
-
91
-
92
-
93
-
94
-
95
-
96
-
97
-
98
-
99
-
100
-
101
-
102
-
103
-
104
-
105
-
106
-
107
-
108
-
109
-
110
-
111
-
112
-
113
-
114
-
115
-
116
-
117
-
118
-
119
-
120
-
121
-
122
-
123
-
124
-
125
-
126
-
127
-
128
-
129
-
130
-
131
-
132
-
133
-
134
-
135
-
136
-
137
-
138
-
139
-
140
-
141
-
142
-
143
-
144
-
145
-
146
-
147
-
148
-
149
-
150
-
151
-
152
-
153
-
154
-
155
-
156
-
157
-
158
-
159
-
160
-
161
-
162
-
163
-
164
-
165
-
166
-
167
-
168
-
169
-
170
-
171
-
172
-
173
-
174
-
175
-
176
 |
 |