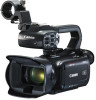
Canon XA40 XA40 XA45 Instruction Manual - Page 73
Microphone Attenuator (INPUT terminals)
 |
View all Canon XA40 manuals
Add to My Manuals
Save this manual to your list of manuals |
Page 73 highlights
Recording Audio Microphone Attenuator (INPUT terminals) When one of the audio channels is set to the INPUT terminals and the corresponding sensitivity selection switch is set to MIC or MIC+48V, you can activate the external microphone's attenuator (20 dB). 1 Select the desired INPUT terminal's sensitivity. > [C ! Audio Setup] > [INPUT 1 Mic Att.] or [INPUT 2 Mic Att.] 2 Select [i On] and then select [X]. 73 • å appears at the right of the screen. Using the Built-in Microphone or an External Microphone Connected to the MIC Terminal If the handle unit is attached to the camcorder but you will not connect an external microphone to an INPUT terminal, follow the step below to use the built-in microphone or an external microphone connected to the MIC terminal. When an external microphone is connected to the MIC terminal, the camcorder will switch automatically from the built-in microphone to the external one. Set the INPUT terminal ON/OFF switch to OFF. • If you connect a microphone to the MIC terminal, the camcorder will switch automatically from the built-in microphone to the external microphone. To use a commercially available plug-in power microphone 1 Select [MIC Power]. > [¡ # Audio Setup] > [MIC Power] 2 Select [i On] and then select [X]. IMPORTANT • Supplying power to a microphone without plug-in power functionality may damage the microphone. Adjusting the L and R channels of the MIC terminal independently You can use the > [¡ Audio Setup] > [MIC ALC Link] setting to separate the audio level adjustment for the L and R channels of an external microphone connected to the MIC terminal, allowing each channel to be adjusted independently.
-
 1
1 -
2
-
3
-
4
-
5
-
6
-
7
-
8
-
9
-
10
-
11
-
12
-
13
-
14
-
15
-
16
-
17
-
18
-
19
-
20
-
21
-
22
-
23
-
24
-
25
-
26
-
27
-
28
-
29
-
30
-
31
-
32
-
33
-
34
-
35
-
36
-
37
-
38
-
39
-
40
-
41
-
42
-
43
-
44
-
45
-
46
-
47
-
48
-
49
-
50
-
51
-
52
-
53
-
54
-
55
-
56
-
57
-
58
-
59
-
60
-
61
-
62
-
63
-
64
-
65
-
66
-
67
-
 68
68 -
 69
69 -
 70
70 -
 71
71 -
 72
72 -
 73
73 -
 74
74 -
 75
75 -
 76
76 -
 77
77 -
 78
78 -
79
-
80
-
81
-
82
-
83
-
84
-
85
-
86
-
87
-
88
-
89
-
90
-
91
-
92
-
93
-
94
-
95
-
96
-
97
-
98
-
99
-
100
-
101
-
102
-
103
-
104
-
105
-
106
-
107
-
108
-
109
-
110
-
111
-
112
-
113
-
114
-
115
-
116
-
117
-
118
-
119
-
120
-
121
-
122
-
123
-
124
-
125
-
126
-
127
-
128
-
129
-
130
-
131
-
132
-
133
-
134
-
135
-
136
-
137
-
138
-
139
-
140
-
141
 |
 |
