Canon XH A1 XH G1 XH A1 Instruction Manual - Page 91
Copying a Custom Display File to the Memory Card, Loading a Custom Display File from the Memory Card
 |
UPC - 013803063769
View all Canon XH A1 manuals
Add to My Manuals
Save this manual to your list of manuals |
Page 91 highlights
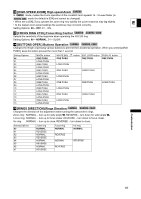
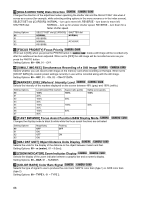
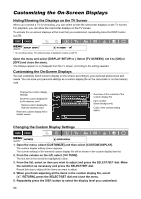
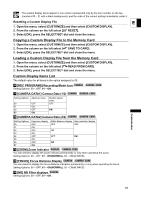
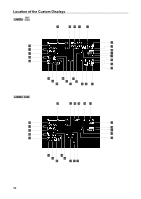
The custom display items appear in one screen represented only by the item number on the top (numbers 00 - 21 with a black background), and the code of the current setting immediately under it. Resetting a Custom Display File E 1. Open the menu, select [CUSTOMIZE] and then select [CUSTOM DISPLAY]. 2. From the column on the left select [ RESET]. 3. Select [OK], press the SELECT/SET dial and close the menu. Copying a Custom Display File to the Memory Card 1. Open the menu, select [CUSTOMIZE] and then select [CUSTOM DISPLAY]. 2. From the column on the left select [ SAVE TO CARD]. 3. Select [OK], press the SELECT/SET dial and close the menu. Loading a Custom Display File from the Memory Card 1. Open the menu, select [CUSTOMIZE] and then select [CUSTOM DISPLAY]. 2. From the column on the left select [ READ FROM CARD]. 3. Select [OK], press the SELECT/SET dial and close the menu. Custom Display Items List The default value for all items is the option assigned to 00. 00 [REC PROGRAMS] Recording Mode Icon Setting Options: 00 - OFF, 01 - ON. Customization 01 [CAMERA DATA1] Camera Data (1/2) Setting Options Aperture value 00 OFF 01 ON 02 OFF 03 ON Shutter speed value OFF ON 02 [CAMERA DATA2] Camera Data (2/2) Setting Options 00 01 02 03 04 05 06 07 Exposure display OFF ON OFF ON OFF ON OFF ON White Balance display Gain selection display OFF OFF ON OFF ON ON 03 [ZOOM] Zoom Indicator You can select to display the zoom indicator permanently or only when operating the zoom. Setting Options: 00 - OFF, 01 - ON(NORMAL), 02 - ON(ALWAYS). 04 [FOCUS] Focus Distance Display You can select to display the focus distance indication permanently or only when operating the focus. Setting Options: 00 - OFF, 01 - ON(NORMAL), 02 - ON(ALWAYS) 05 [ND] ND Filter displays Setting Options: 00 - OFF, 01 - ON. 91
-
 1
1 -
2
-
3
-
4
-
5
-
6
-
7
-
8
-
9
-
10
-
11
-
12
-
13
-
14
-
15
-
16
-
17
-
18
-
19
-
20
-
21
-
22
-
23
-
24
-
25
-
26
-
27
-
28
-
29
-
30
-
31
-
32
-
33
-
34
-
35
-
36
-
37
-
38
-
39
-
40
-
41
-
42
-
43
-
44
-
45
-
46
-
47
-
48
-
49
-
50
-
51
-
52
-
53
-
54
-
55
-
56
-
57
-
58
-
59
-
60
-
61
-
62
-
63
-
64
-
65
-
66
-
67
-
68
-
69
-
70
-
71
-
72
-
73
-
74
-
75
-
76
-
77
-
78
-
79
-
80
-
81
-
82
-
83
-
84
-
85
-
 86
86 -
 87
87 -
 88
88 -
 89
89 -
 90
90 -
 91
91 -
 92
92 -
 93
93 -
 94
94 -
 95
95 -
 96
96 -
97
-
98
-
99
-
100
-
101
-
102
-
103
-
104
-
105
-
106
-
107
-
108
-
109
-
110
-
111
-
112
-
113
-
114
-
115
-
116
-
117
-
118
-
119
-
120
-
121
-
122
-
123
-
124
-
125
-
126
-
127
-
128
-
129
-
130
-
131
-
132
-
133
-
134
-
135
-
136
-
137
-
138
-
139
-
140
-
141
-
142
-
143
-
144
-
145
-
146
-
147
-
148
-
149
-
150
-
151
-
152
-
153
-
154
-
155
-
156
-
157
-
158
-
159
-
160
-
161
-
162
-
163
-
164
 |
 |