Canon iP6000D iP6000D Diect Print Guide - Page 75
Print Head Deep Cleaning - printing problems
 |
UPC - 013803038101
View all Canon iP6000D manuals
Add to My Manuals
Save this manual to your list of manuals |
Page 75 highlights
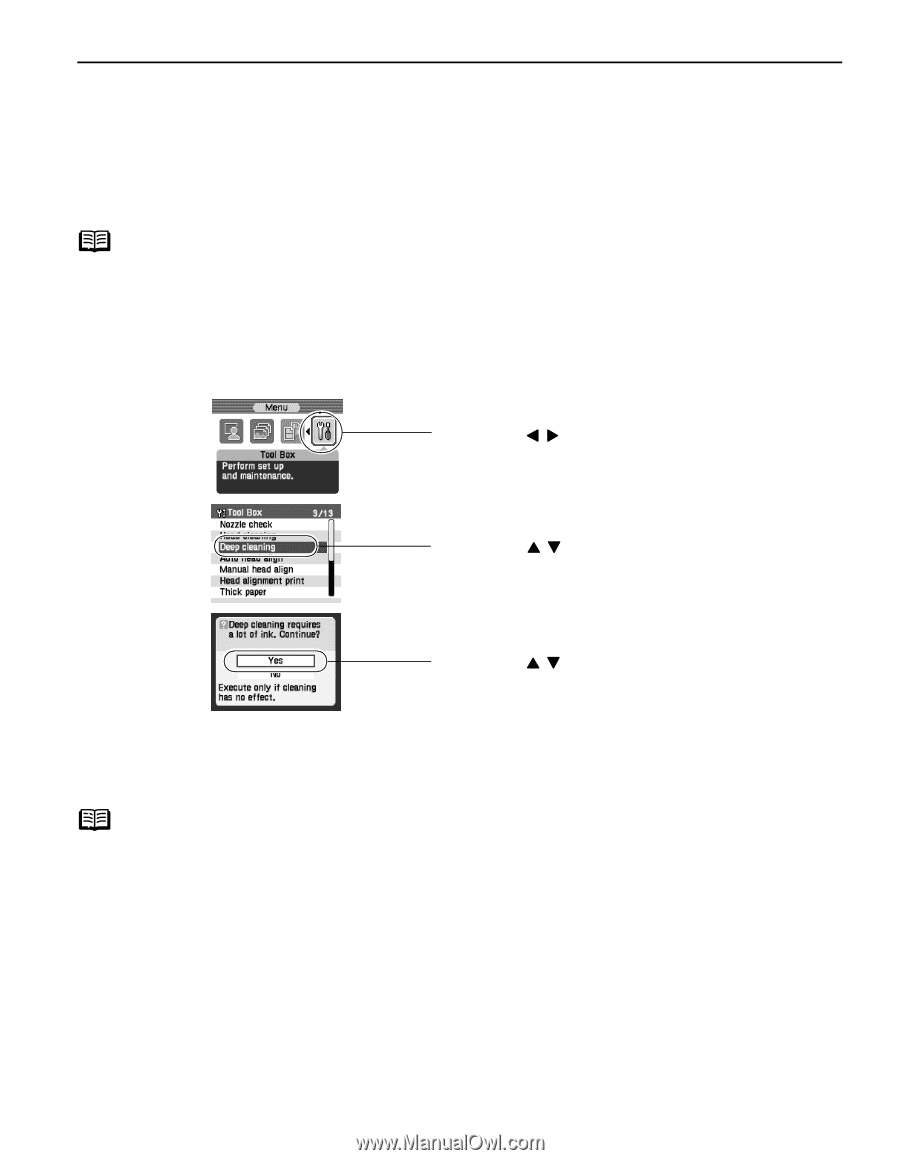
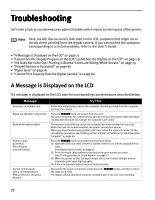
Print Head Deep Cleaning If print quality does not improve by standard print head cleaning, try print head deep cleaning, which is a more powerful process. Print head deep cleaning consumes ink, so perform this procedure only when necessary. Note Ensure that the inner cover is closed. 1 Ensure that the printer is on. 2 Print Head Deep Cleaning. (1) Press the Menu button. (2) Use the buttons to select Tool Box and then press the OK button. The Tool Box screen is displayed. (3) Use the buttons to select Deep cleaning and then press the OK button. The confirmation screen is displayed. (4) Use the buttons to select Yes and then press the OK button. Important The process takes about one minute to complete, so simply wait until the POWER lamp stops flashing. Note After print head cleaning finishes After print head deep cleaning finishes, print the nozzle check pattern to verify that the print head nozzles are clean. See "Printing the Nozzle Check Pattern" on page 71. When one specific color only does not print, see "Replacing Ink Tanks" on page 67. If the problem remains, make sure that ink remains in the ink tank. Then turn off the printer's power for at least 24 hours, and perform deep cleaning of the print head again. If the problem still remains, the print head may be damaged. Contact the Customer Care Center. 74
-
 1
1 -
2
-
3
-
4
-
5
-
6
-
7
-
8
-
9
-
10
-
11
-
12
-
13
-
14
-
15
-
16
-
17
-
18
-
19
-
20
-
21
-
22
-
23
-
24
-
25
-
26
-
27
-
28
-
29
-
30
-
31
-
32
-
33
-
34
-
35
-
36
-
37
-
38
-
39
-
40
-
41
-
42
-
43
-
44
-
45
-
46
-
47
-
48
-
49
-
50
-
51
-
52
-
53
-
54
-
55
-
56
-
57
-
58
-
59
-
60
-
61
-
62
-
63
-
64
-
65
-
66
-
67
-
68
-
69
-
 70
70 -
 71
71 -
 72
72 -
 73
73 -
 74
74 -
 75
75 -
 76
76 -
 77
77 -
 78
78 -
 79
79 -
 80
80 -
81
-
82
-
83
-
84
-
85
-
86
-
87
-
88
 |
 |