Canon imageCLASS D761 imageCLASS D780/D760/D761 Reference Guide - Page 51
the Canon logo label is facing up.
 |
View all Canon imageCLASS D761 manuals
Add to My Manuals
Save this manual to your list of manuals |
Page 51 highlights
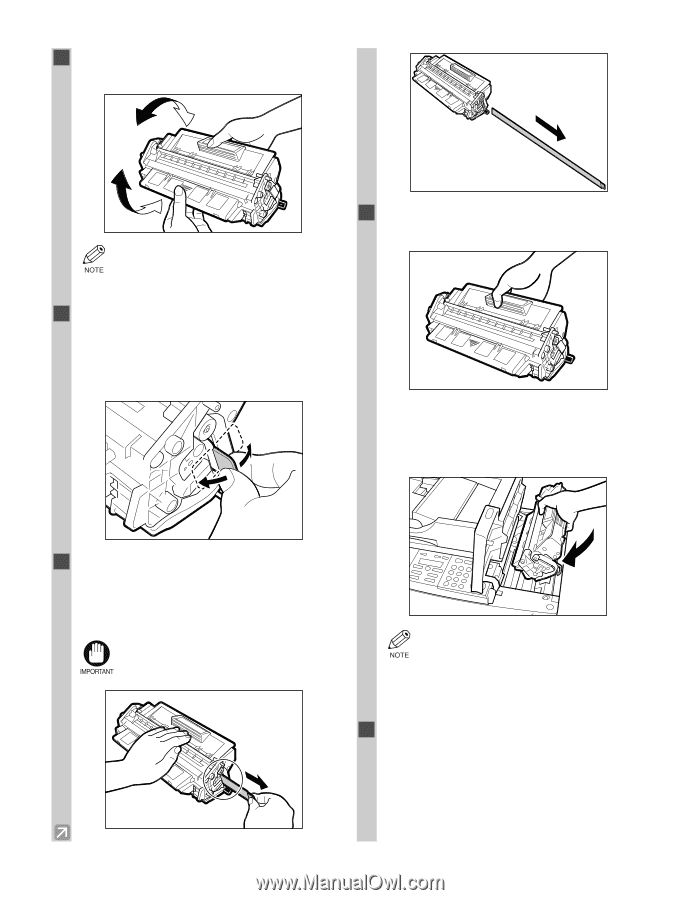
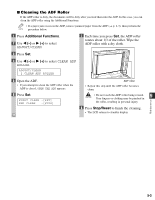
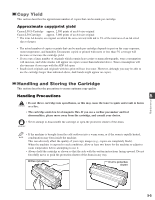
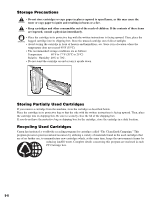
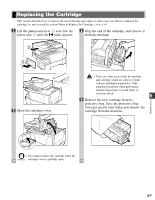
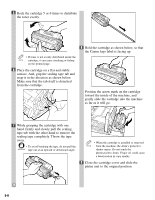
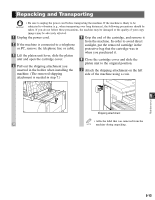
5 Rock the cartridge 5 or 6 times to distribute the toner evenly. • If toner is not evenly distributed inside the NOTE cartridge, it can cause streaking or fading on the printed page. 6 Place the cartridge on a flat and stable surface. And, grip the sealing tape tab and snap it in the direction as shown below. Make sure that the tab itself is detached from the cartridge. 8 Hold the cartridge as shown below, so that the Canon logo label is facing up. Position the arrow mark on the cartridge toward the inside of the machine, and gently slide the cartridge into the machine as far as it will go. 7 While grasping the cartridge with one hand, firmly and slowly pull the sealing tape tab with the other hand to remove the sealing tape completely. Throw the tape away. • To avoid breaking the tape, do not pull the IMPORTANT tape out at an upward or downward angle. • When the cartridge is installed or removed NOTE from the machine, the drum's protective shutter opens. Do not touch the photosensitive drum. Finger oil could cause a deterioration in copy quality. 9 Close the cartridge cover and slide the platen unit to the original position. 5-8
-
 1
1 -
2
-
3
-
4
-
5
-
6
-
7
-
8
-
9
-
10
-
11
-
12
-
13
-
14
-
15
-
16
-
17
-
18
-
19
-
20
-
21
-
22
-
23
-
24
-
25
-
26
-
27
-
28
-
29
-
30
-
31
-
32
-
33
-
34
-
35
-
36
-
37
-
38
-
39
-
40
-
41
-
42
-
43
-
44
-
45
-
 46
46 -
 47
47 -
 48
48 -
 49
49 -
 50
50 -
 51
51 -
 52
52 -
 53
53 -
 54
54 -
 55
55 -
 56
56 -
57
-
58
-
59
-
60
-
61
-
62
-
63
-
64
-
65
-
66
-
67
-
68
-
69
-
70
-
71
-
72
-
73
-
74
-
75
-
76
-
77
-
78
-
79
-
80
-
81
-
82
 |
 |