Canon imageCLASS D880 imageCLASS D800 Series Set-Up Instructions - Page 4
Connect the power cord., Set the fax receive mode. Only for the imageCLASS D880 model - manual
 |
View all Canon imageCLASS D880 manuals
Add to My Manuals
Save this manual to your list of manuals |
Page 4 highlights
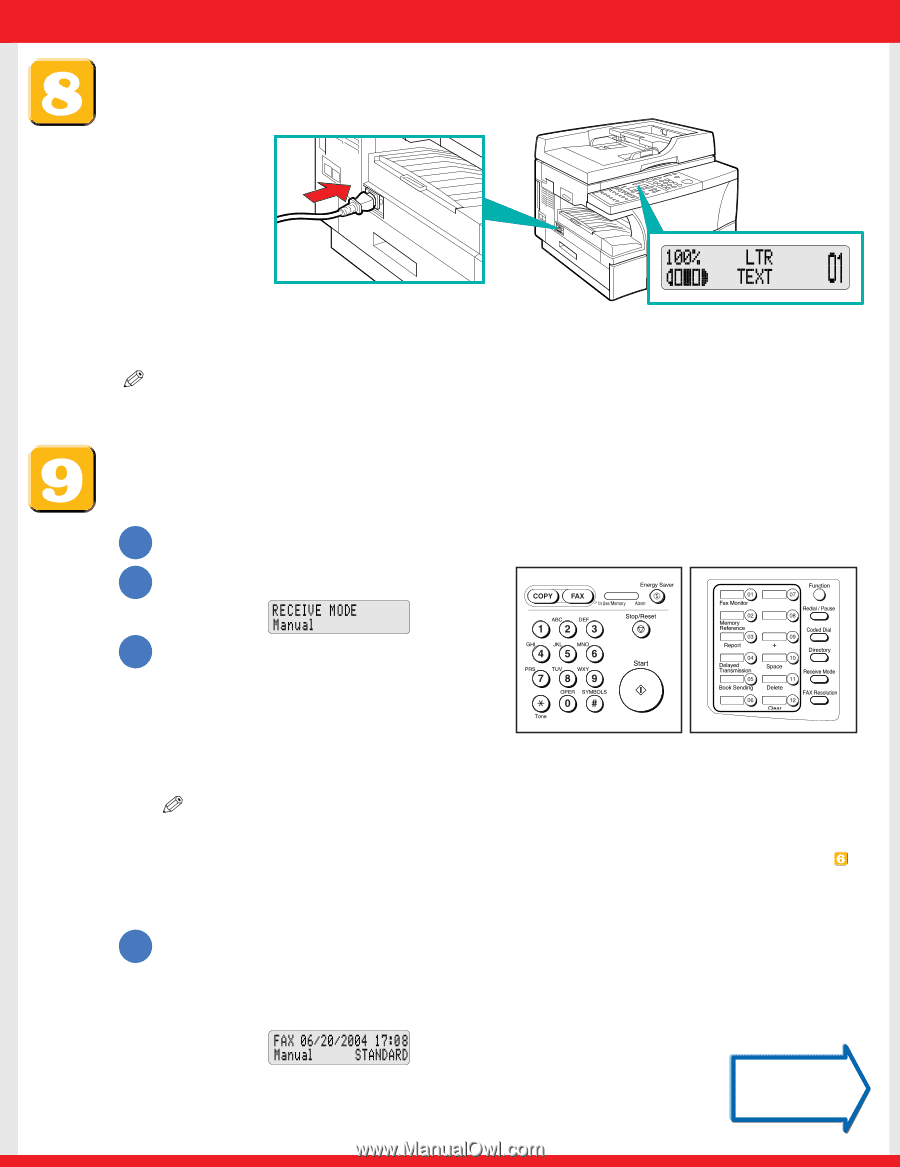
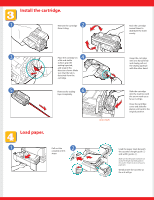
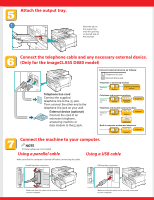
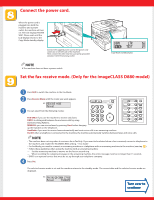
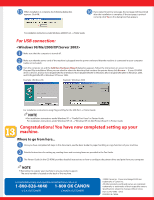
Connect the power cord. When the power cord is plugged into both the machine and a power outlet, the machine will turn on. The LCD displays PLEASE WAIT. Please wait until the LCD display returns to the Copy Mode standby display. Connect the supplied power cord to the power cord connector on the left side of the machine. Then connect the other end into a properly grounded standard 120 V three-prong outlet. Copy Mode standby display NOTE ● The machine does not have a power switch. Set the fax receive mode. (Only for the imageCLASS D880 model) 1 Press FAX to switch the machine to the Fax Mode. 2 Press Receive Mode until the mode you want appears. ex: 3 You can select from the following modes: FAX ONLY: if you use the machine to receive only faxes. DRPD: to distinguish between fax and voice calls by using Distinctive Ring Patterns. MANUAL: you can receive faxes by pressing Start before hanging up the handset on the telephone. AnsMode: if you want to receive faxes automatically and route voice calls to an answering machine. FaxTel: when a telephone is connected to the machine, the machine automatically switches between faxes and voice calls. NOTE • The machine does not ring when it receives a fax in FaxOnly. If you want to be alerted when a fax is received, connect a telephone to the machine, and enable the INCOMING RING setting. → Fax Guide • For AnsMode, you need to connect an answering machine or a telephone with an answering machine to the machine (see step ). • Follow these guidelines when using the machine with an answering machine: - Set the answering machine to answer on the first or second ring. - When recording the outgoing message on the answering machine, the entire message must be no longer than 15 seconds. • DRPD is an optional service that must be set up through your telephone company. 4 Press Set. The selected receive mode is set and the machine returns to the standby mode. The current date and the selected receive mode are displayed. ex: Turn over to continue
-
 1
1 -
 2
2 -
 3
3 -
 4
4 -
 5
5 -
 6
6 -
 7
7 -
 8
8
 |
 |