Carvin C3248 Concert Series Operating GUide - Page 12
Sound Check, Channel Connections And Sub-mixing, Master Outputs, Band Eq
 |
View all Carvin C3248 manuals
Add to My Manuals
Save this manual to your list of manuals |
Page 12 highlights
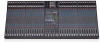
SOUND CHECK In a live sound reinforcement system, the input signals to the mixer will come from the microphones and instruments. Each microphone or instrument must be connected to one of the mixing console inputs. It is preferred to have as many of the stage instruments as possible plugged into the mixer. This allows for the best overall control of the instruments as they are mixed together and then amplified by the system. The mixer can be operated on the stage or from a remote location in the audience using a "snake cable" to bring the signals from the stage to the mixer. The advantage of the remote operation allows the performance to be mixed from the audience's perspective. NOTE: Most snake cables are not designed for speaker connections. THE SOUND CHECK The sound check takes some skill but mostly patience from the performers and especially "you" the system operator. If you miss something during the sound check, the sound may suffer during the performance. The basic sound check follows this format: First test all microphones and other input devices(direct boxes, etc.) before the performers are included in the sound check. A good thing to also check here is feedback in the monitors from the microphones. Good positioning of the monitors and the use of a graphic equalizer solves most major monitor feedback problems. Now for a sound check with the performers. First set the level of each performer individually and in cases where a performer has multiple microphones such as drummers, set each drum mic individually then the drum set as a whole. This is also a good time to make some channel EQ control adjustments to tailor the sound of the individual performers and instruments. After setting each individual, have the performers run through a song. Don't hesitate to stop the performers if something needs to be adjusted or a performer or microphone needs to be heard solo again. Remember the sound check is not a rehearsal but a system check. It is always a good idea for the operator to have a microphone to inform the performers of what is needed during the sound check. If a monitor system is being used, the operator's microphone should only be directed through the monitors when addressing the on stage performers, especially if something needs to be checked during the show. CHANNEL CONNECTIONS AND SUB-MIXING The XLR Mic inputs are balanced low impedance inputs. +48V Phantom power for condenser mics is available in channel groups of eight. This enables the user to group all mics that require phantom power together, leaving the rest of the channels available for dynamic microphones or line inputs. The XLR Mic inputs and balanced 1/4" Line inputs on each channel can be used simultaneously, however the two signals will be controlled by the channel GAIN control. Adjust the level of the instruments to balance the mix. For stereo instruments, such as keyboards or drum machines, use two consecutive channels to connect the Left and Right outputs from the instrument. Then use the PAN controls on the two channels to pan hard left and right for a stereo mix. If a pair of individual channels are not available, one of the stereo returns in the master section can be used. Whenever possible, try to group all related instruments or mics near each other on the mixer. For example: put all drum mics on channels 1 through 8, guitars, bass and keyboards on 9 through 16, and vocals on 17 through 24. This will make mixing, channel assigning and sub-mixing easier to manage. The 4 bus section on the C48 mixers can be used for main outputs, surround outputs, side fills, outputs to a multi-track recorder, etc. but the most common use is for sub mixing. Sub grouping is the process of assigning multiple channels to a sub group fader in the master section. This is usually done to decrease the number of faders needed to adjust a group of channels. For example: a drum kit with 6 or more microphones mixed in mono can be assigned to a sub-mix fader. If the drums need to be adjusted in the main mix, only one group fader needs to be adjusted instead of 6 channel faders. The individual microphones all use different fader settings, so it is important to get a balanced mix of the entire drum kit during the sound check. The drum sub-group fader is then assigned to the L-R main faders. For a mono mix, use the channel pan controls to pan the audio "hard left" and the audio will only be assigned to sub- group fader 1 or 3. Panning "hard right" will bus the audio to sub-mix faders 2 or 4. Always keep channel and sub group faders higher than the master L-R faders. Using the L-R fader or sub group fader to boost the level of a weak channel signal can result in excess noise. Tom Floor Tom Snare Kick The diagram depicts a standard live sound system 1. Stereo EQ and power amp for the main speakers on the Left/Right outputs. 2. Stereo power amp for two monitor mixes on the MON 1 and MON2 outputs. 3. Bridged power amp for a subwoofer on the MONO/SUB output. 4. Power amp for side fill or back of room fill on the Group output 4. 5. External effects processor connected to EFF 1 SEND and RETURNS 3. 6. Vocal mics. 7. Four drum mics on channels 2-6, assigned to subgroups 1 & 2 for sub mixing. 8. Mic'd guitar amp. 9. Direct Out from bass amp. 10. Stereo keyboard on 1/4" LINE inputs. 6 7 2 10 MASTER OUTPUTS The main amps and speakers should contain an overall mix of all channels. The sub-group faders 1-4 can have certain channels assigned to them before the mix arrives at the master L-R faders. This is known as sub-mixing and can improve the efficiency of mixing a large number of channels (see above). The six independent monitor mixes use the MON 1 through MON 6 sends. On the channel these sends are pre-EQ, pre-fader. The MONO/SUB output can be used for a main mono mix, a center mix or as a subwoofer output. The sub group outputs can also be used as side or back fill speakers. Long rooms can have poor sound at the back of the room. Set up a set of back fill loudspeakers to fill in and add a digital delay to the main speakers to correct the time delay from front to back. This can improve the sound of the room considerably. 8 9 5 1 3 4 9-BAND EQ When the 9 band graphic EQ sliders are in the center "0" position, they do not affect the audio signal. When the EQ sliders are raised or lowered from this position, they boost or cut respectively a narrow band of frequencies. Start with the "0" setting and move each slider up and down to hear the difference. For tone enhancement, you may want to raise 62Hz or 125Hz (for fuller sounding bass) and the 8kHz or 16kHz (for crisper highs). Sometimes lowering one slider can be more effective than boosting several. If the mix sounds too raw or harsh try reducing the 1kHz or 2kHz slider, if the mix is too boomy try lowering the 250Hz or 500Hz slider. To reduce feedback in the low frequency range, try lowering one of the 63, 125 or 250 Hz sliders. High frequency feedback is usually reduced by lowering the 2kHz or 4kHz slider. To help with feedback reduction, the microphones should be placed further back on the stage than the main speakers. 1122 channels 2-6 assigned to sub-mix group faders 1 and 2
-
 1
1 -
2
-
3
-
4
-
5
-
6
-
 7
7 -
 8
8 -
 9
9 -
 10
10 -
 11
11 -
 12
12 -
 13
13 -
 14
14 -
 15
15 -
 16
16
 |
 |
