Casio PCR-26S Owners Manual - Page 10
Loading Paper Roll And Replacing The Printer's Ink Roll
 |
UPC - 079767507251
View all Casio PCR-26S manuals
Add to My Manuals
Save this manual to your list of manuals |
Page 10 highlights
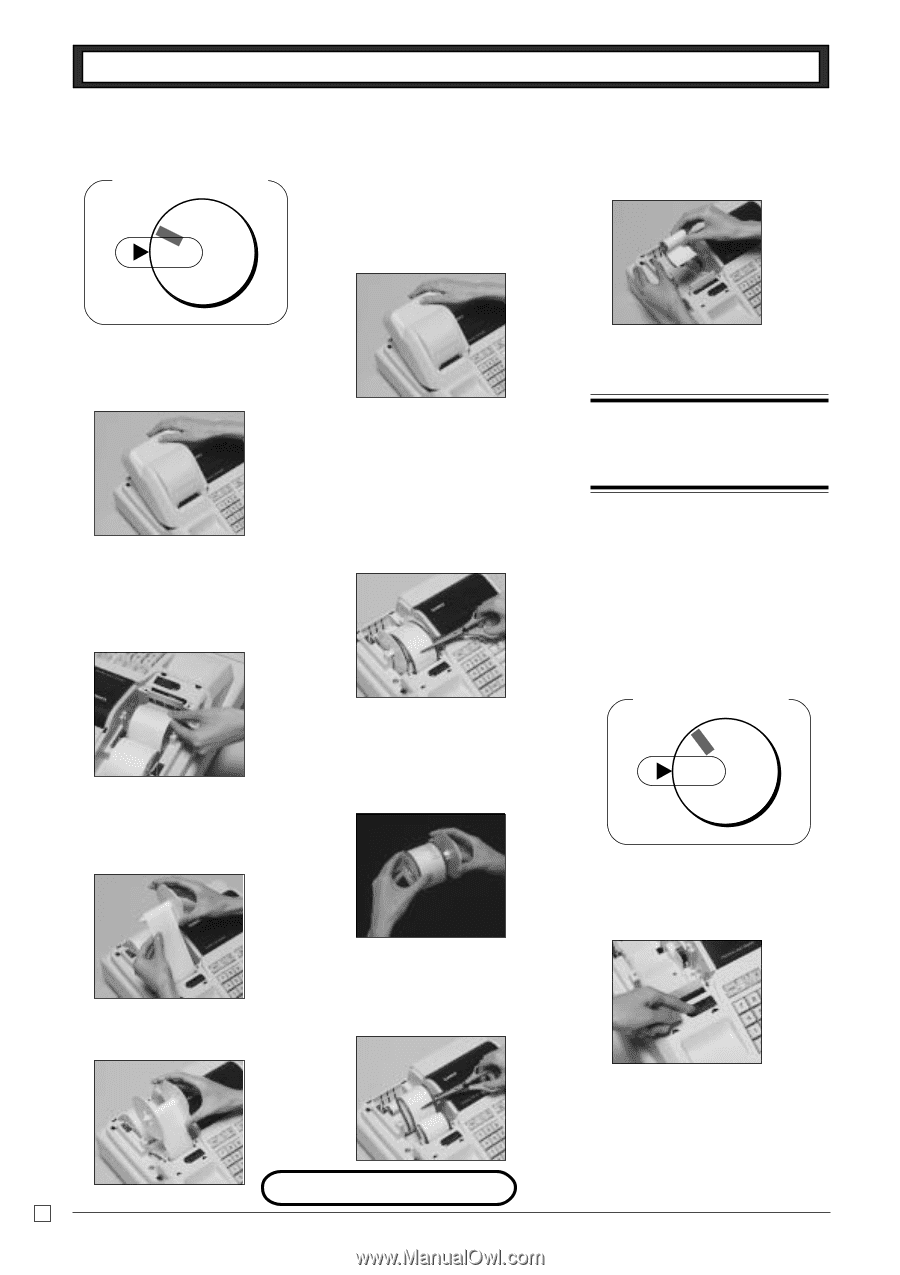
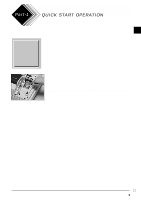
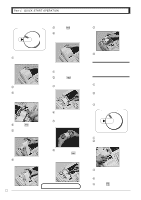
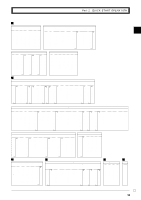
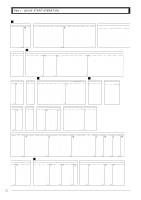
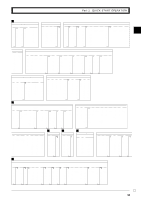
Part-1 QUICK START OPERATION 2. Loading Paper Roll And Replacing The Printer's Ink Roll Mode Switch to REG CAL REG OFF & Press the l key to take up any slack in the paper. * Replace the printer cover by placing the cover's front tab into the regis- ter's groove. & Remove the core of the paper. RF PGM PGM Z X CAL Z X 1. To load journal paper ! Remove the printer cover by lifting up the back. @ Put a roll of journal paper into the holder. # Cut the leading end of the roll paper with scissors and insert the paper into the inlet. $ Press the l key until 20 or 30 cm of paper is fed from the printer. % Roll the paper onto the take-up reel a few turns. 2. To remove journal paper ! Remove the printer cover following the instructions above. @ Press the l key until approxi- mately 20cm of the paper is fed from the printer. # Cut off the roll paper. $ Remove the take-up reel from the printer and take off the left plate of the reel. % Remove the journal paper from the take-up reel. * Load new paper following the instruc- tions above, and replace the printer cover. Default printer setting is for Journal. To print receipts, please refer to 1-7-3 on page 27 to switch the printer for Receipt or Journal. ◗ To load receipt paper ! To use the printer to print receipts, follow steps 1 through 4 of "To load journal paper". @ Pass the leading end of the receipt paper through the printer cover's paper outlet and replace the printer cover. # Tear off any excess paper. Mode Switch to OFF REG OFF RF ◗ To replace the ink roll ! Remove the printer cover. @ Lift up the tab on the ink roll marked "PULL UP". ^ Set the left plate of the take-up reel and place the reel into the register. ^ Cut off the paper left in the printer and press the l key until the remaining paper is fed out from the printer. E 10 Options: Roll paper - P-5860 Ink Roll - IR-40 # Install a new Ink Roll and press it down firmly but gently until it snaps into place. $ Replace the printer cover onto the cash register. % Press the m key to check for cor- rect operation.
-
 1
1 -
2
-
3
-
4
-
 5
5 -
 6
6 -
 7
7 -
 8
8 -
 9
9 -
 10
10 -
 11
11 -
 12
12 -
 13
13 -
 14
14 -
 15
15 -
16
-
17
-
18
-
19
-
20
-
21
-
22
-
23
-
24
-
25
-
26
-
27
-
28
-
29
-
30
-
31
-
32
-
33
-
34
-
35
-
36
-
37
-
38
-
39
-
40
-
41
-
42
-
43
-
44
 |
 |