Casio PX 110 User Guide - Page 19
Recording Your Keyboard Play - with stand
 |
UPC - 079767361150
View all Casio PX 110 manuals
Add to My Manuals
Save this manual to your list of manuals |
Page 19 highlights
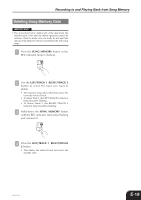
Recording to and Playing Back from Song Memory Recording Your Keyboard Play You can record to either track with or without playback of the other track. To record to one track without playing back the other When recording a different tune to Track 2 after recording to Track 1, make sure you carefully read the notes under steps 1 and 2 before actually performing the steps. 1 Press the SONG MEMORY button so the PLAY indicator lamp is lit. • Select the tone and effects you want to use in your recording, and configure the tempo and beat settings. NOTE • If you are recording a different tune to Track 2 after recording to Track 1, press the LEFT/TRACK 1 RIGHT/TRACK 2 button to turn off the L/T1 indicator lamp. Unlit Lit NOTE • If you want to record to Track 2, press the LEFT/ TRACK 1 RIGHT/TRACK 2 button here. This will cause the RIGHT/TRACK 2 indicator lamp to flash, which indicates that the piano is standing by for recording to Track 2. • If you want to use the metronome during recording, press the METRONOME button to start it. • If you want to use a rhythm and/or auto accompaniment during recording (to Track 1 only), select the rhythm and chord mode. 3 Start playing something on the keyboard. • This will automatically start recording. • Actually, there are a variety of different ways to start the record operation. See "Starting the Record Operation" below for more information. 4 When you are finished, press the START/ STOP button to stop recording. • If you are using a rhythm, you can stop recording with an ending pattern by pressing the INTRO/ENDING button. • Stopping recording causes the REC indicator lamp to go out, and indicator lamp above the button of the track to which you recorded to light. • To play back the track you just recorded, press the START/STOP button again. 5 After you are finished recording or playing back, press the SONG MEMORY button so the PLAY lamp or REC lamp turns off. 2 Press the SONG MEMORY button so the REC indicator lamp is flashing. • At this time the LEFT/TRACK 1 indicator lamp should also be flashing. This indicates that the piano is standing by for recording to Track 1. Starting the Record Operation You can use any of the following methods to start a record operation in step 2 of the above procedure. I When recording to Track 1 with rhythm or auto accompaniment • Press the START/STOP button to start recording. • Press the SYNCHRO/FILL-IN button to put the piano into synchro start standby. Recording will start when you finger a chord in the accompaniment range of the keyboard. • Press the INTRO/ENDING button to put the piano into synchro start standby. Recording will start and an intro pattern will play when you finger a chord in the accompaniment range of the keyboard. 404A-E-019C E-17
-
 1
1 -
2
-
3
-
4
-
5
-
6
-
7
-
8
-
9
-
10
-
11
-
12
-
13
-
 14
14 -
 15
15 -
 16
16 -
 17
17 -
 18
18 -
 19
19 -
 20
20 -
 21
21 -
 22
22 -
 23
23 -
 24
24 -
25
-
26
-
27
-
28
-
29
-
30
-
31
-
32
 |
 |