Casio QV-5000SX Owners Manual - Page 4
Unpacking, General Guide, Monitor Screen - digital camera 3
 |
View all Casio QV-5000SX manuals
Add to My Manuals
Save this manual to your list of manuals |
Page 4 highlights
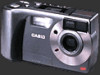
UNPACKING Check to make sure that all of the items shown below are included with your camera. If something is missing, contact your dealer as soon as possible. Camera Alkaline batteries (AA-size × 4) Connecting the Wrist Strap Pass the wrist strap through the hole on the side of the camera as shown in the illustration. IMPORTANT! Be sure to keep the wrist strap around your wrist whenever using the camera to protect against accidentally dropping it. Soft case Video cable Wrist strap Manual Using the Soft Case Keep the camera in its soft case to protect it when not in use. Slide the stopper and close the soft case as shown in the illustration. Stopper 13 GENERAL GUIDE The following illustrations show the names of each component, button and switch on the camera. Top and Display Lens 246 8 1 35 7 9 0 AB 1 Viewfinder 2 FLASH button 3 MACRO/SELF-TIMER buton 4 ZOOM button 5 MODE button 6 POWER switch 7 [-] 8 [+] 9 Operation indicator 0 LCD A LCD button B Function switch Bottom P QR P Tripod hole Q Battery compartment cover R Battery compartment lock C D EF GH I JL N KM O C Shutter button D MENU button E DISP button F Flash G Exposure sensor H Indicator display I Distance sensor J Terminal panel cover K AC Power terminal L VIDEO OUT terminal M DIGITAL terminal N Self-timer indicator O Lens Opening the Terminal Panel Cover 14 Self-Timer Indicator and Operation Indicator • The Self-timer Indicator flashes when the self-timer is performing a timer operation prior to releasing the shutter. Self-timer indicator • The Operation Indicator shows the operational status of the camera as described below. Operation indicator Operation Indicator Record Mode Indicator Color Green On Auto Focus operation complete Amber Red Exposure warning Cannot focus Memory full Cannot charge GENERAL GUIDE Flashing Please wait (after power on) Image store operation in progress Charging Error Playback Mode (when connecting video cable) Indicator Color Green Red On Playing back Low battery Flashing Please wait (after power on) Low Battery Warning Flashes for 3 seconds and then goes out. 15 MONITOR SCREEN Pressing DISP causes various indicators to appear on the monitor screen. If the monitor screen is turned off, press the LCD button to turn it on before pressing DISP. DISP button LCD button Recording Mode Self-timer Macro indicator Flash Mode Auto None Flash On Flash Off Red-eye reduction Recording Mode Remaining number of pages Mode (SUPER FINE) (FINE) (NORMAL) (ECONOMY) Zoom factor Battery capacity EV shift Focus indicator Recording Mode Indicators Normal Recording Movie Recording Panorama Recording Title Recording 16
-
 1
1 -
 2
2 -
 3
3 -
 4
4 -
 5
5 -
 6
6 -
 7
7 -
 8
8 -
 9
9 -
 10
10 -
11
-
12
-
13
-
14
-
15
-
16
-
17
-
18
-
19
 |
 |
