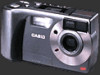
Casio QV-5000SX Owners Manual - Page 7
Using Focus Lock, Using the Flash, Resolution Settings, Exposure Adjustment - drivers
 |
View all Casio QV-5000SX manuals
Add to My Manuals
Save this manual to your list of manuals |
Page 7 highlights
Macro Correction Frame This frame shows the focus range when the distance from the lens to the subject is 30 cm (11.8"). You can use the viewfinder for distances from 30 cm (11.8") to infinity. When using Auto Focus, compose the subject so it is within the Auto Focus Frame. Press / to enter the Macro Mode or use the Manual Mode for distances less than 30 cm (11.8"). • Entering the Macro Mode automatically turns on the moni- tor screen. Use the monitor screen to compose images in the Macro Mode. RECORDING Using Focus Lock Normally, Auto Focus automatically focuses on the object that is inside the Auto Focus Frame. Focus lock is a technique that lets you lock the focus on a subject and then move the camera so the Auto Focus Frame is pointed at another subject when you record. This keeps the original subject in focus, even though a different object is within the Auto Focus Frame. 1. Align the Auto Focus Frame with the subject you want to lock on and press the shutter button half way down. 2. While keeping the shut- ter button depressed half way, move the camera and compose the image as you want. 3. Press the shutter button all the way down to record the image. 25 RECORDING Using the Flash You can use the built-in flash unit to provide illumination during recording. 1. Press . • Each press of cycles through the flash mode in the following sequence: Auto On Off Redeye Reduction. button Indicator None Flash Mode Auto Flash Flash On Flash Off Red-eye Reduction Description Flash is automatically enabled and disabled in accordance with exposure conditions. Flash is always fired, regardless of exposure conditions. Flash is never fired, regardless of exposure conditions. Fires a pre-flash followed by recording with flash, which reduces the chance of red-eye. 26 • The monitor screen goes blank and the operation indicator flashes while the flash unit is charging. Operation indicator IMPORTANT! • Never use the flash in areas where combustible or ex- plosive gas is present. Doing so creates the danger of fire and explosion. • Never fire the flash in the direction of a person operating a motor vehicle. Doing so can interfere with the driver's vision and create the danger of accident. • Never fire the flash while it is too close to the subject's eyes. Be especially careful with small children. Intense light from the flash can cause eye damage if it is fired too close to the eyes, especially with young children. When using the flash, the camera should be at least one meter (40") from the eyes of the subject. • Make sure that you do not touch or block the flash or exposure sensor with your fingers. Doing so can soil these components and interfere with correct flash operation. • Flash should be used for distances within the range of about 0.7 meters to 2 meters (2.3' to 6.6'). Flash does not work well outside this range. • Depending on operating conditions (type of battery being used, temperature, etc.), it may take up to 10 seconds for the flash unit to charge. • The flash is disabled during movie recording. The indicator flashes to indicate this condition. • The flash unit will not charge when battery power is low. The indicator flashes red to warn you that the flash will not fire correctly, which may affect exposure of the image. Replace batteries as soon as possible when this happens. • Red-eye reduction may not work well when the camera is not pointed directly at the subject or when the subject is far from the camera. • In the Red-eye Reduction Mode, the flash is fired automatically in accordance with exposure. Because of this, the flash will not fire in a well-lit area. • Use the flash in areas where available lighting is dim. If you do not use a flash, shutter speed slows down and creates the possibility of blurred images due to camera movement. Mount the camera on a tripod if you decide not to use the flash. RECORDING Resolution Settings The camera has four resolution modes: Super Fine ( ), Fine ( ), Normal ( ), Economy ( ). The following shows the number of images that can be recorded in memory when all images are the same resolution. Use the procedure under "Manual Recording" on page 34 for details on changing the resolution modes. Setting Indicator Resolution Number of Images Computer Output image Super Fine 16 1280 x 960 pixels (450KB compressed) Fine 30 1280 x 960 pixels (225KB compressed) Normal 57 1280 x 960 pixels (113KB compressed) Economy 88 640 x 480 pixels (64KB compressed) The above figures are approximations only. The actual number of images depends on image subject matter. 27 RECORDING Exposure Adjustment This camera features an program AE function that automatically changes shutter speed and aperture in accordance with available light. In addition, you can also manually adjust the exposure to compensate for backlighting, indirect indoor lighting, dark backgrounds, and other special conditions. To manually adjust the exposure If the LCD is turned off, press the LCD button to turn it on. 1. Set the Function Switch to REC. 2. Use [+] and [-] to perform exposure compensa- tion. • Pressing [+] or [-] displays an EV indicator that shows the current exposure compensation setting. • Pressing [+] makes the image on the LCD brighter. Use it to adjust for dim indoor lighting and backlighting. • Pressing [-] makes the image on the LCD darker. Use it to adjust for bright sunlight. • The EV indicator turns red whenever the compensation value is at its limit. 3. After adjusting the exposure, press the shutter button to record the image. 28
-
 1
1 -
 2
2 -
 3
3 -
 4
4 -
 5
5 -
 6
6 -
 7
7 -
 8
8 -
 9
9 -
 10
10 -
 11
11 -
 12
12 -
13
-
14
-
15
-
16
-
17
-
18
-
19
 |
 |
