Casio XJ-A141 User Guide - Page 10
Setting Up the Projector, Setup Precautions
 |
View all Casio XJ-A141 manuals
Add to My Manuals
Save this manual to your list of manuals |
Page 10 highlights
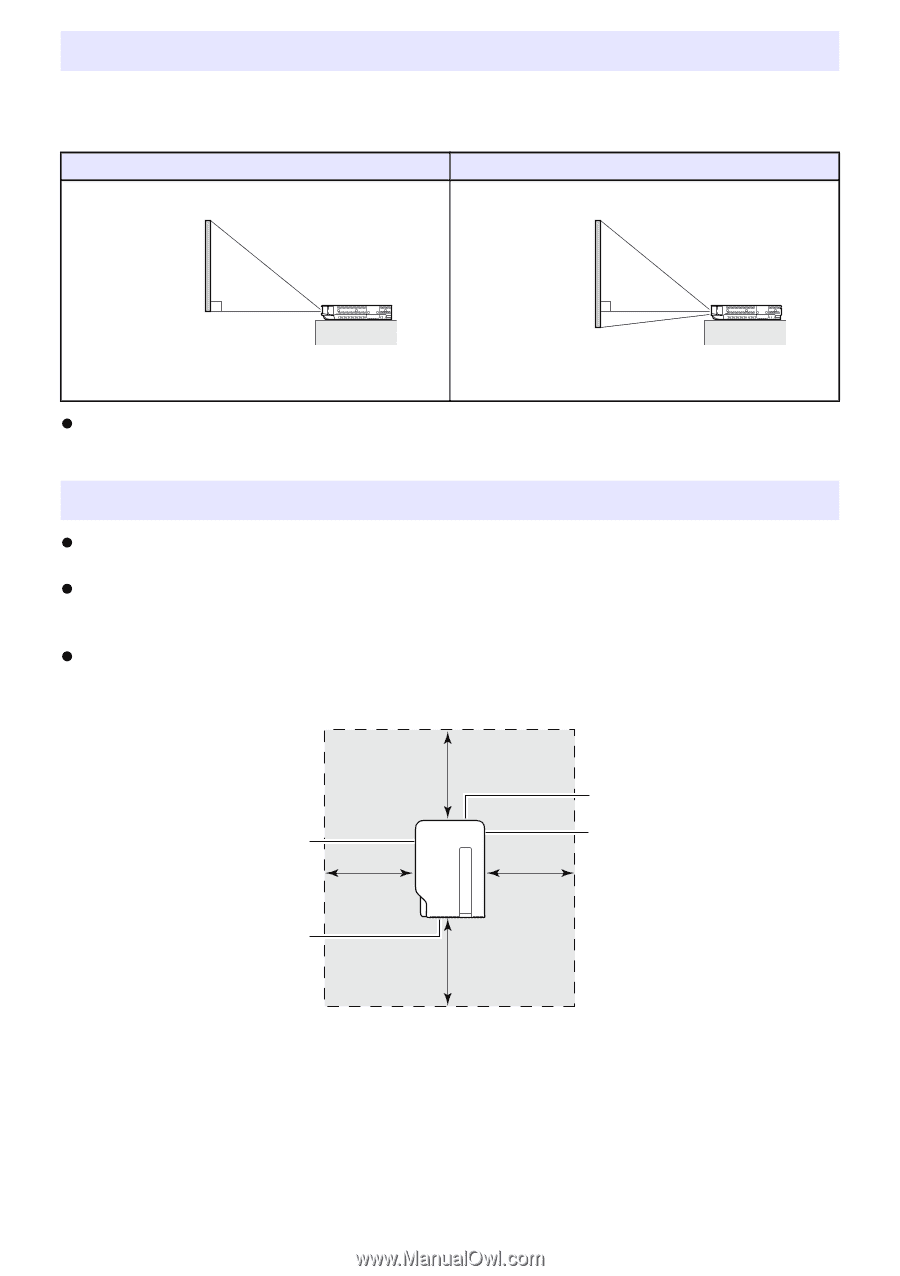
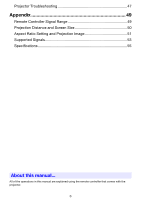
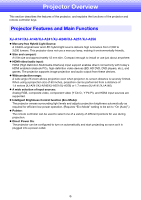
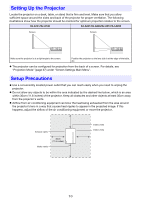
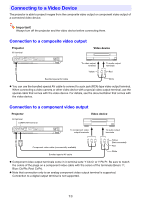
Setting Up the Projector Locate the projector on a desk, table, or stand that is firm and level. Make sure that you allow sufficient space around the sides and back of the projector for proper ventilation. The following illustrations show how the projector should be oriented for optimum projection relative to the screen. XJ-A141/XJ-A146 XJ-A241/XJ-A246/XJ-A251/XJ-A256 Screen Screen Make sure the projector is at a right angle to the screen. Position the projector so the lens side is at the edge of the table, etc. z The projector can be configured for projection from the back of a screen. For details, see "Projection Mode" (page 37) under "Screen Settings Main Menu". Setup Precautions z Use a conveniently located power outlet that you can reach easily when you need to unplug the projector. z Do not allow any objects to be within the area indicated by the dashed line below, which is an area within 30cm (11.8 inches) of the projector. Keep all obstacles and other objects at least 30cm away from the projector's vents. z Airflow from air conditioning equipment can blow the heat being exhausted from the area around the projector's lens in a way that causes heat ripples to appear in the projected image. If this happens, adjust the airflow of the air conditioning equipment or move the projector. Exhaust vents Intake vents 30cm (11.8 inches) Intake vents Intake vents 10
-
 1
1 -
2
-
3
-
4
-
 5
5 -
 6
6 -
 7
7 -
 8
8 -
 9
9 -
 10
10 -
 11
11 -
 12
12 -
 13
13 -
 14
14 -
 15
15 -
16
-
17
-
18
-
19
-
20
-
21
-
22
-
23
-
24
-
25
-
26
-
27
-
28
-
29
-
30
-
31
-
32
-
33
-
34
-
35
-
36
-
37
-
38
-
39
-
40
-
41
-
42
-
43
-
44
-
45
-
46
-
47
-
48
-
49
-
50
-
51
-
52
-
53
-
54
-
55
-
56
 |
 |