Celestron TrekGuide Orange TrekGuide Manual (English, French, German, Italian, - Page 5
Ompass, Ensor, Alibration, Agnetic, Eclination, Irection, Eaning, Earing, Egend
 |
View all Celestron TrekGuide Orange manuals
Add to My Manuals
Save this manual to your list of manuals |
Page 5 highlights
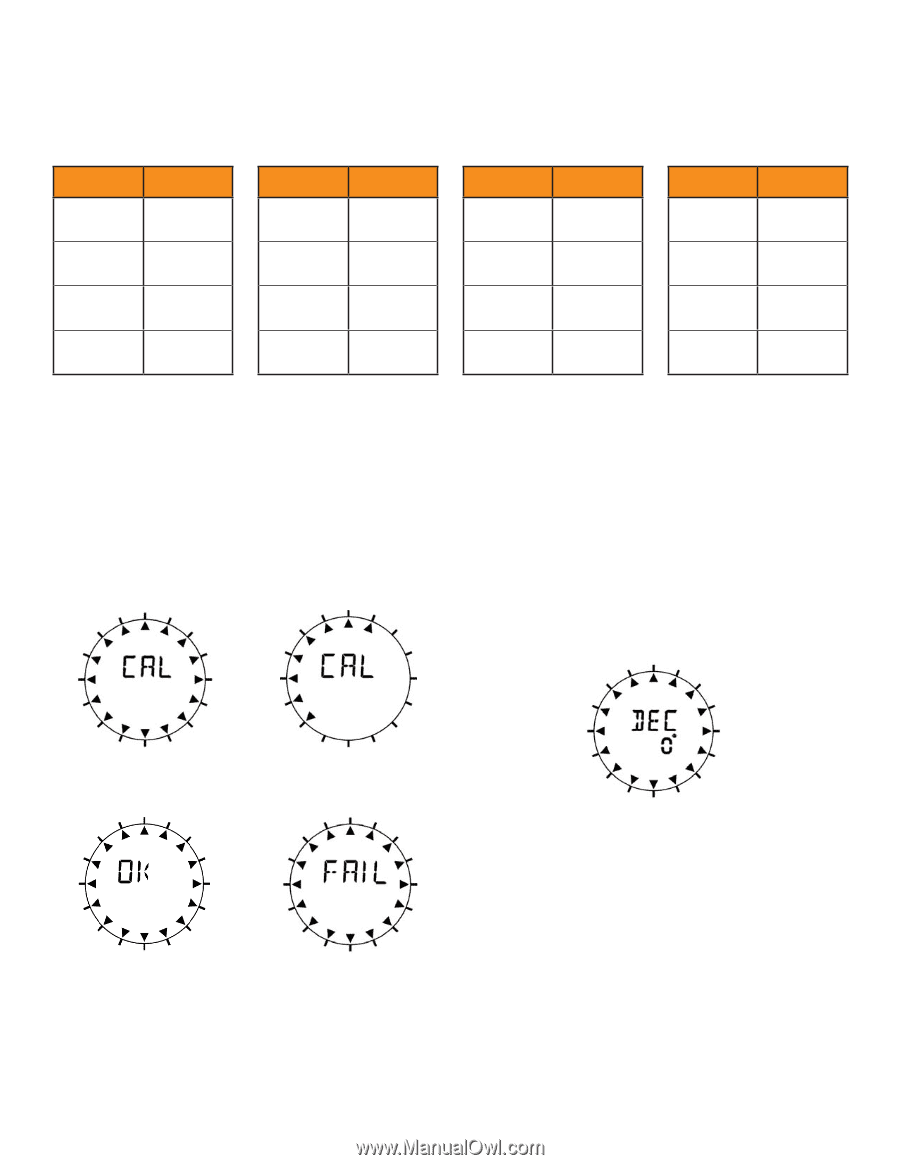
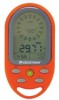
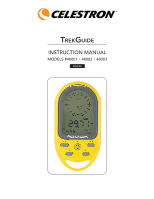
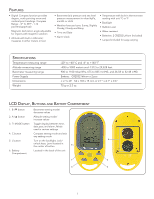
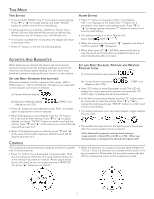
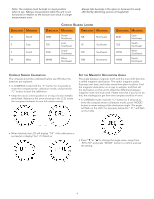
Note: The compass must be kept in a level position when in use. Taking a measurement while the unit is not horizontal (in relation to the horizon) can result in a large measurement error. Always take bearings in the open air, because it is easily affected by disturbing sources of magnetism. Direction Meaning N North E East S South W West Compass Bearing Legend Direction Meaning Direction Meaning NNE NorthNortheast NE ESE EastSoutheast SE SSW SouthSouthwest SW WNW WestNorthwest NW Northeast Southeast Southwest Northwest Direction Meaning ENE EastNortheast SSE SouthSoutheast WSW WestSouthwest NNW NorthNorthwest Compass Sensor Calibration The compass should be calibrated before use OR when the batteries are replaced. • In COMPASS mode hold the "C" button for 3 seconds to enter the compass sensor calibration mode, and press the "C" button to start the calibration. • Keep the unit in a level position or on top of a non-metallic table/desk. Reference the arrow showing in the LCD, rotate the compass clockwise for one full rotation slowly: Set the Magnetic Declination Angle The angle between magnetic north and the true north direction is called magnetic declination. The earth's magnetic poles fluctuate over time, and it also varies from place to place. Find the magnetic declination on a map or website, and then set the declination on this unit to offset the difference between magnetic north and true north. Please note that if you fail to do this, the readings you get from the compass could be in error. • In COMPASS mode, hold the "C" button for 3 seconds to enter the compass sensor calibration mode, press "MODE" button to enter setting of the declination angle. The angle will flash on the LCD. For example, below the " 0° " will flash on the LCD). → → • When finished, the LCD will display "OK" if the calibration is successful or display"Fail" if it failed as: • Press "▼"or "▲"to change the angle value, range from -90°to 90°, and press "MODE" button to confirm and exit the setting. 4
-
 1
1 -
 2
2 -
 3
3 -
 4
4 -
 5
5 -
 6
6 -
 7
7 -
 8
8 -
 9
9 -
 10
10 -
 11
11 -
12
-
13
-
14
-
15
-
16
-
17
-
18
-
19
-
20
-
21
-
22
-
23
-
24
-
25
-
26
-
27
-
28
-
29
-
30
-
31
-
32
-
33
-
34
-
35
-
36
-
37
-
38
-
39
-
40
 |
 |