Cisco 4402 Configuration Guide - Page 48
Step 2: Radius
 |
UPC - 882658039997
View all Cisco 4402 manuals
Add to My Manuals
Save this manual to your list of manuals |
Page 48 highlights
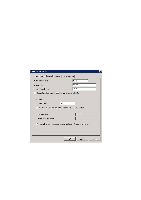
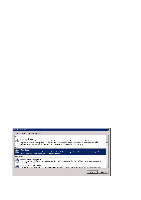
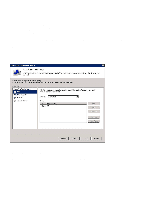
A certificate is required to activate PEAP. To add a certificate: Start → Run Type "mmc" and click on "OK". In the window which opens, click on "File" and then "Add/Remove Snap-in". Click on "Add..." on the "Standalone" tab. Select "Certificates" and click on "Add" Select "Computer account" and click on "Next" Select "Local computer" and click on "Apply" Click on "Close" followed by "OK" in all the windows that are open. Click on the plus sign in front of "Certificates". Right-click on "Personal", select "All tasks" and "Request New Certificate" Follow the instructions on the screen until a new certificate has been created. Close the console window. Step 2: Radius The clients are permitted to submit authentication requests to the RADIUS server, which the server then grants locally or forwards. For more information about eduroam, visit www.eduroam.no. The clients which can be added here may be access points, a control unit for wireless equipment (such as a Security Switch) or other RADIUS servers forwarding authentication. NB: When a control unit, such as a Security Switch or similar, is used for a wireless network one usually only needs to add it as a client and not all the access points. Open the Network Policy Server by Clicking on "Start Menu" → "Administrative Tools"→ "Network Policy Server" Expand "RADIUS Clients and Servers", right-click on "RADIUS Clients" and select "New RADIUS Client 48
-
 1
1 -
2
-
3
-
4
-
5
-
6
-
7
-
8
-
9
-
10
-
11
-
12
-
13
-
14
-
15
-
16
-
17
-
18
-
19
-
20
-
21
-
22
-
23
-
24
-
25
-
26
-
27
-
28
-
29
-
30
-
31
-
32
-
33
-
34
-
35
-
36
-
37
-
38
-
39
-
40
-
41
-
42
-
 43
43 -
 44
44 -
 45
45 -
 46
46 -
 47
47 -
 48
48 -
 49
49 -
 50
50 -
 51
51 -
 52
52 -
 53
53 -
54
-
55
-
56
-
57
-
58
-
59
-
60
 |
 |
