Cisco PIX 501 Quick Start Guide - Page 5
Power On the PIX 501 - firewall
 |
UPC - 746320551470
View all Cisco PIX 501 manuals
Add to My Manuals
Save this manual to your list of manuals |
Page 5 highlights
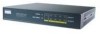
Note Make sure that one of the PCs has TCP/IP installed and is configured to obtain an IP address automatically through DHCP. This allows the PC to communicate with the PIX 501 and the Internet as well as run the PDM Startup Wizard. 4 Power On the PIX 501 4 3 2 1 POWER 0 CONSOLE 3.3V 4.5A Cisco PIX 501 71331 Power supply Follow these steps to power on the PIX Firewall: Step 1 Step 2 Connect the small, round connector of the power supply cable to the power connector on the rear panel. Connect the AC power connector of the power supply input cable to an electrical outlet. Note The PIX 501 does not have a power switch. Completing Step 2 powers on the device. 5
-
 1
1 -
 2
2 -
 3
3 -
 4
4 -
 5
5 -
 6
6 -
 7
7 -
 8
8 -
 9
9 -
 10
10 -
 11
11 -
12
-
13
-
14
-
15
-
16
-
17
-
18
-
19
-
20
 |
 |

5
Note
Make sure that one of the PCs has TCP/IP installed and is configured to obtain an IP
address automatically through DHCP. This allows the PC to communicate with the
PIX 501 and the Internet as well as run the PDM Startup Wizard.
4
Power On the PIX 501
Follow these steps to power on the PIX Firewall:
Step 1
Connect the small, round connector of the power supply cable to the power connector on the
rear panel.
Step 2
Connect the AC power connector of the power supply input cable to an electrical outlet.
Note
The PIX 501 does not have a power switch. Completing Step 2 powers on the device.
POWER
4
3
2
1
0
CONSOLE
3.3V
4.5A
71331
Power supply
Cisco PIX 501