Cisco PLUSB10 User Guide - Page 12
Connecting the USB, Adapter, Connecting the, EtherFast 10/100 Bridge
 |
View all Cisco PLUSB10 manuals
Add to My Manuals
Save this manual to your list of manuals |
Page 12 highlights
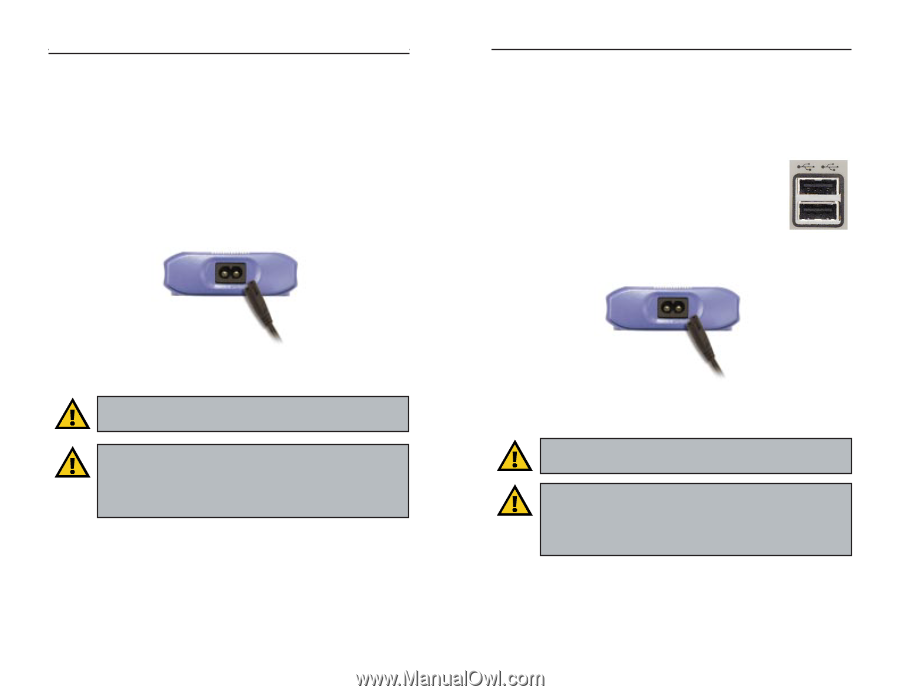
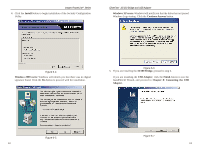
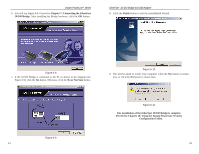
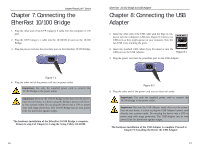
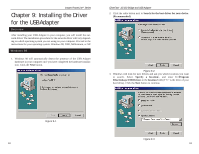
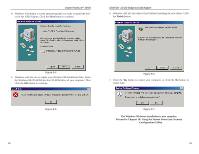
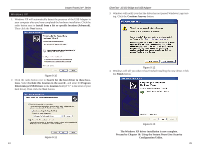
Instant PowerLineTM Series Chapter 7: Connecting the EtherFast 10/100 Bridge 1. Plug the other end of the UTP Category 5 cable into the computer's LAN port. 2. Plug the UTP Category 5 cable into the 10/100 RJ-45 port on the 10/100 Bridge. 3. Plug the power cord into the powerline port on the EtherFast 10/100 Bridge. Figure 7-1 4. Plug the other end of the power cord into an power outlet. Important: Use only the supplied power cord to connect the 10/100 Bridge to the power outlet. Important: Because the 10/100 Bridge sends data over the powerlines of your house, it is best to plug the Bridge's power cord directly into a power outlet. Do not plug the device into a UPS or power strip with surge protection. The 10/100 Bridge has its own power filter for protection against surges. The hardware installation of the EtherFast 10/100 Bridge is complete. Return to step 6 of Chapter 6: Using the Setup Utility CD-ROM. 16 EtherFast® 10/100 Bridge and USB Adapter Chapter 8: Connecting the USB Adapter 1. Insert the other end of the USB cable with the Type A connector into the computer's USB port. Figure 8-1 shows two USB ports as they might appear on your computer. Note the two USB icons marking the ports. 2. Insert the standard USB cable's Type B connector into the USB port on the USB Adapter. Figure 8-1 3. Plug the power cord into the powerline port on the USB Adapter. Figure 8-2 4. Plug the other end of the power cord into an electrical outlet. Important: Use only the supplied power cord to connect the 10/100 Bridge to the power outlet. Important: Because the USB Adapter sends data over the powerlines of your house, it is best to plug the USB Adapter's power cord directly into a power outlet. Do not plug the device into a UPS or power strip with surge protection. The USB Adapter has its own power filter for protection against surges. The hardware installation of the USB Adapter is complete. Proceed to Chapter 9: Installing the Driver the USB Adapter. 17
-
 1
1 -
2
-
3
-
4
-
5
-
6
-
 7
7 -
 8
8 -
 9
9 -
 10
10 -
 11
11 -
 12
12 -
 13
13 -
 14
14 -
 15
15 -
 16
16 -
 17
17 -
18
-
19
-
20
-
21
-
22
-
23
-
24
-
25
-
26
 |
 |