Cisco SPA962-NA Administration Guide - Page 39
Mounting the Phone to the Wall, Turning on the Phone, Using the Administration Web Server
 |
View all Cisco SPA962-NA manuals
Add to My Manuals
Save this manual to your list of manuals |
Page 39 highlights
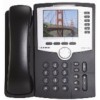
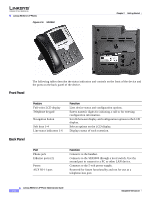
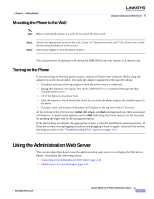
Chapter 2 Getting Started Mounting the Phone to the Wall Using the Administration Web Server Note When mounting the phone to a wall, do not attach the desk stand. Step 1 Step 2 Attach two appropriate screws to the wall. Leave 1/4" distance from the wall. This allows you to slide the mounting brackets on to the screws. Push down slightly to lock the phone in place. You can purchase an optional wall mount kit (MB100) from your retailer or Linksys.com. Turning on the Phone If you are using an external power source, instead of Power over Ethernet (PoE), plug the adapter to an electrical outlet. Use only the adapter supplied for the specific phone. • The phone executes a boot-up sequence when the power source is connected. • During this sequence, the display first shows LINKSYS® or a customized message and then "Initializing Network." • All of the lights on the phone flash. • After the sequence, which should take about five seconds, the phone displays the standard menu for the phone. • The date, name, and number of the phone will display on the top line of the LCD screen. At the bottom of the LCD screen, redial, dir, cfwd, and dnd are displayed over their associated soft buttons. A small arrow appears next to dnd indicating that more menus can be accessed by pushing the right side of the navigation button. If the phone does not display the appropriate screen, verify the installation and connectivity. If these are correct, try unplugging the phone and plugging it back in again. If you still do not see the display, refer to the "Troubleshooting FAQ" section on page 3-32. Using the Administration Web Server This section describes how to use the administration web server to configure the 900 Series phone. It includes the following topics: • Connecting to the Administration Web Server, page 2-12 • Administrator Account Privileges, page 2-12 Document Version 3.0 Linksys 900 Series IP Phone Administrator Guide 2-11
-
 1
1 -
2
-
3
-
4
-
5
-
6
-
7
-
8
-
9
-
10
-
11
-
12
-
13
-
14
-
15
-
16
-
17
-
18
-
19
-
20
-
21
-
22
-
23
-
24
-
25
-
26
-
27
-
28
-
29
-
30
-
31
-
32
-
33
-
 34
34 -
 35
35 -
 36
36 -
 37
37 -
 38
38 -
 39
39 -
 40
40 -
 41
41 -
 42
42 -
 43
43 -
 44
44 -
45
-
46
-
47
-
48
-
49
-
50
-
51
-
52
-
53
-
54
-
55
-
56
-
57
-
58
-
59
-
60
-
61
-
62
-
63
-
64
-
65
-
66
-
67
-
68
-
69
-
70
-
71
-
72
-
73
-
74
-
75
-
76
-
77
-
78
-
79
-
80
-
81
-
82
-
83
-
84
-
85
-
86
-
87
-
88
-
89
-
90
-
91
-
92
-
93
-
94
-
95
-
96
-
97
-
98
-
99
-
100
-
101
-
102
-
103
-
104
-
105
-
106
-
107
-
108
-
109
-
110
-
111
-
112
-
113
-
114
-
115
-
116
-
117
-
118
-
119
-
120
-
121
-
122
-
123
-
124
-
125
-
126
-
127
-
128
-
129
-
130
-
131
-
132
-
133
-
134
-
135
-
136
-
137
-
138
-
139
-
140
-
141
-
142
-
143
-
144
-
145
-
146
-
147
-
148
-
149
-
150
-
151
-
152
-
153
-
154
-
155
-
156
-
157
-
158
-
159
-
160
-
161
-
162
-
163
-
164
 |
 |