Craftsman 11779 Operation Manual - Page 10
Hz, AC only.
 |
UPC - 033287141029
View all Craftsman 11779 manuals
Add to My Manuals
Save this manual to your list of manuals |
Page 10 highlights
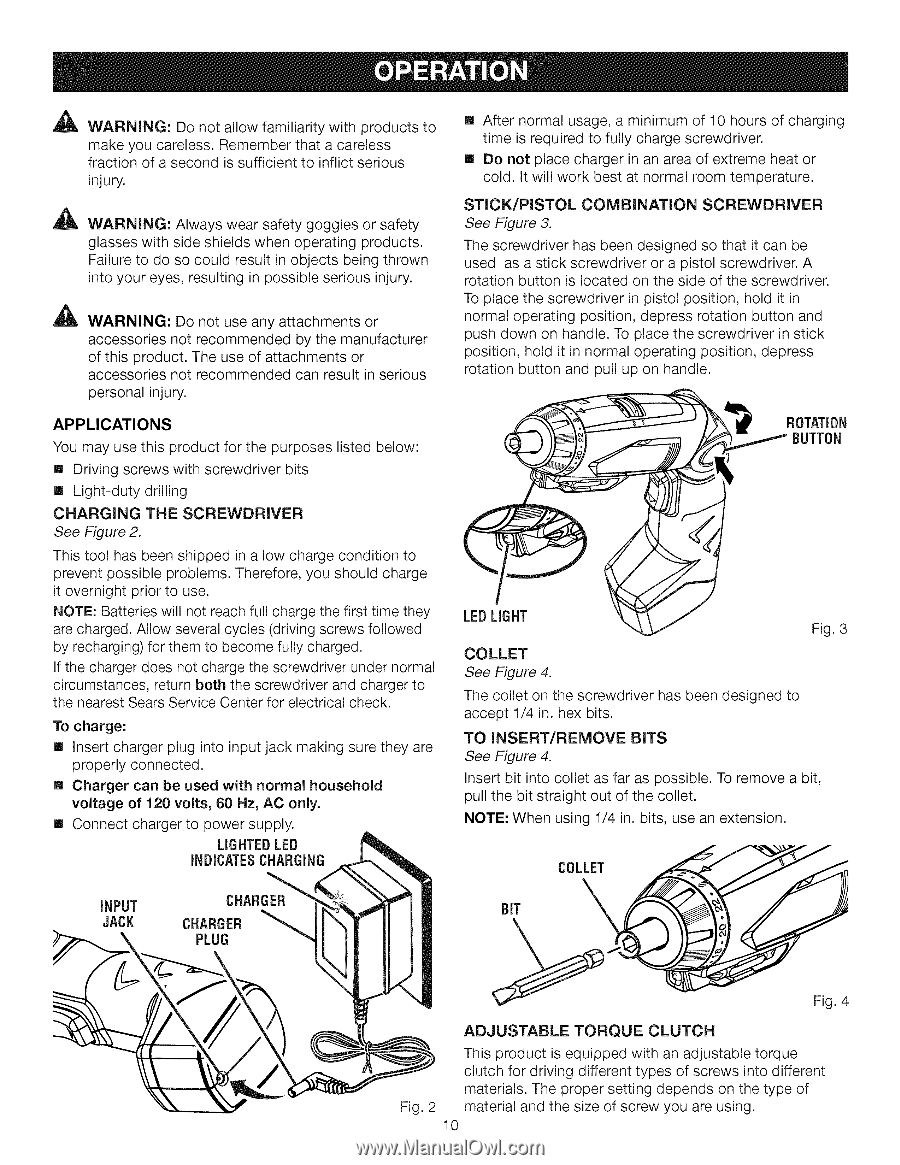
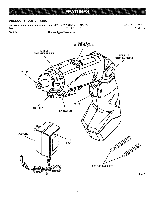
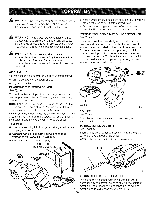
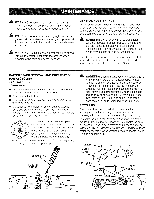
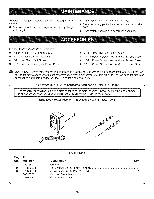
A WARNING: Do not allow familiarity with products to make you careless. Remember that a careless fraction of a second is sufficient to inflict serious injury. A WARNING: Always wear safety goggles or safety glasses with side shields when operating products. Failure to do so could result in objects being thrown into your eyes, resulting in possible serious injury. A WARNING: Do not use any attachments or accessories not recommended by the manufacturer of this product. The use of attachments or accessories not recommended can result in serious personal injury. APPLICATIONS You may use this product for the purposes listed below: [] Driving screws with screwdriver bits [] Light-duty drilling CHARGING THE SCREWDRIVER See Figure 2. This tool has been shipped in a low charge condition to prevent possible problems. Therefore, you should charge it overnight prior to use. NOTE: Batteries will not reach full charge the first time they are charged. Allow several cycles (driving screws followed by recharging) for them to become fully charged. If the charger does not charge the screwdriver under normal circumstances, return both the screwdriver and charger to the nearest Sears Service Center for electrical check. To charge: [] Insert charger plug into input jack making sure they are properly connected. [] Charger can be used with normal household voltage of 120 volts, 60 Hz, AC only. [] Connect charger to power supply. LIGHTEDLED INDICATESCHARGING INPUT JACK CHARGER CHARGER PLUG [] After normal usage, a minimum of 10 hours of charging time is required to fully charge screwdriver. [] Do not place charger in an area of extreme heat or cold. It will work best at normal room temperature. STICK/PISTOL COMBINATION SCREWDRIVER See Figure 3. The screwdriver has been designed so that it can be used as a stick screwdriver or a pistol screwdriver. A rotation button is located on the side of the screwdriver. To place the screwdriver in pistol position, hold it in normal operating position, depress rotation button and push down on handle. To place the screwdriver in stick position, hold it in normal operating position, depress rotation button and pull up on handle. ROTATION BUTTON LED LIGHT Fig. 3 COLLET See Figure 4. The collet on the screwdriver has been designed to accept 1/4 in. hex bits. TO INSERT/REMOVE See Figure 4. BITS Insert bit into collet as far as possible. To remove a bit, pull the bit straight out of the collet. NOTE: When using 1/4 in. bits, use an extension. COLLET ___ Fig. 4 ADJUSTABLE TORQUE CLUTCH This product is equipped with an adjustable torque clutch for driving different types of screws into different materials. The proper setting depends on the type of Fig. 2 material and the size of screw you are using. 10
-
 1
1 -
2
-
3
-
4
-
 5
5 -
 6
6 -
 7
7 -
 8
8 -
 9
9 -
 10
10 -
 11
11 -
 12
12 -
 13
13 -
 14
14
 |
 |