Craftsman 17556 Operation Manual - Page 8
See
 |
View all Craftsman 17556 manuals
Add to My Manuals
Save this manual to your list of manuals |
Page 8 highlights
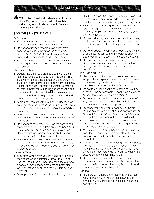
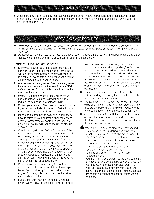
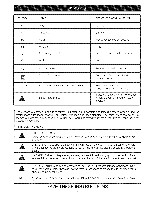
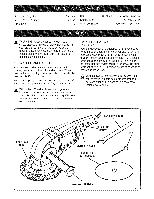
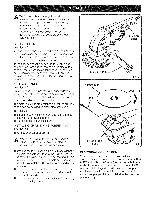
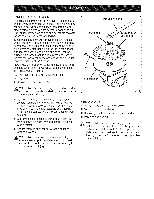
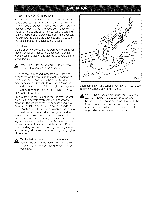
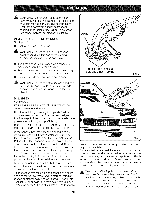
lilililililililihL SANDING DISC SELECTION Selecting the correct size grit and type sanding disc is an extremely important step in achieving a high quality sanded finish. Aluminum oxide, silicon carbide, and other synthetic abrasives are best for power sanding. Natural abrasives, such as flint and garnet are too soft for economical use in power sanding. In general, coarse grit will remove the most material and finer grit will produce the best finish in all sanding operations. The condition of the surface to be sanded will determine which grit will do the job. If the surface is rough, start with a coarse grit and sand until the surface is uniform. Medium grit may then be used to remove scratches left by the coarser grit and finer grit used for finishing of the surface. Always use the proper grit sanding disc, and not extra pressure when sanding. Continue sanding with each grit until surface is uniform. INSTALLING OPTIONAL SANDING DISC See Figure 4. [] Unplug your sander/polisher. SPANNERWRENCH SPANNER NUT SANDINGDiSC (NOT INCLUDED) PiN RUBBER DiSC _ WARNING: Failureto unplug your sander/polisher could result in accidental starting causing possible serious personal injury. [] Position the tool as shown in figure 4 and align the spindle lock hole with the two half-circle notches in motor housing. Lock spindle by inserting the pin provided through spindle lock hole and trapping it in half circle notches. This will prevent spindle from rotating. [] Center the sanding disc over the rubber disc and start spanner nut onto threaded spindle in a clockwise direction. [] Securely tighten spanner nut with the spanner wrench provided. _ ARNING: Remove pin before attempting to operate sander/polisher. Failure to do so could cause pin to be thrown from the tool resulting in possible serious injury. Fig. 4, APPLICATIONS (Use only for the purposes listed below) [] Sanding on wood surfaces. [] Removing rust from and sanding steel surfaces. [] Polishing and buffing. A WARNING: Before connecting your sander/ polisher to power supply source, always check to be sure switch is not in "lock-on" position. Failure to do so could result in accidental starting of your sander/polisher resulting in possible serious injury.
-
 1
1 -
2
-
 3
3 -
 4
4 -
 5
5 -
 6
6 -
 7
7 -
 8
8 -
 9
9 -
 10
10 -
 11
11 -
 12
12 -
 13
13 -
14
 |
 |
