Craftsman 17741 Owners Manual - Page 11
Maintenance
 |
View all Craftsman 17741 manuals
Add to My Manuals
Save this manual to your list of manuals |
Page 11 highlights
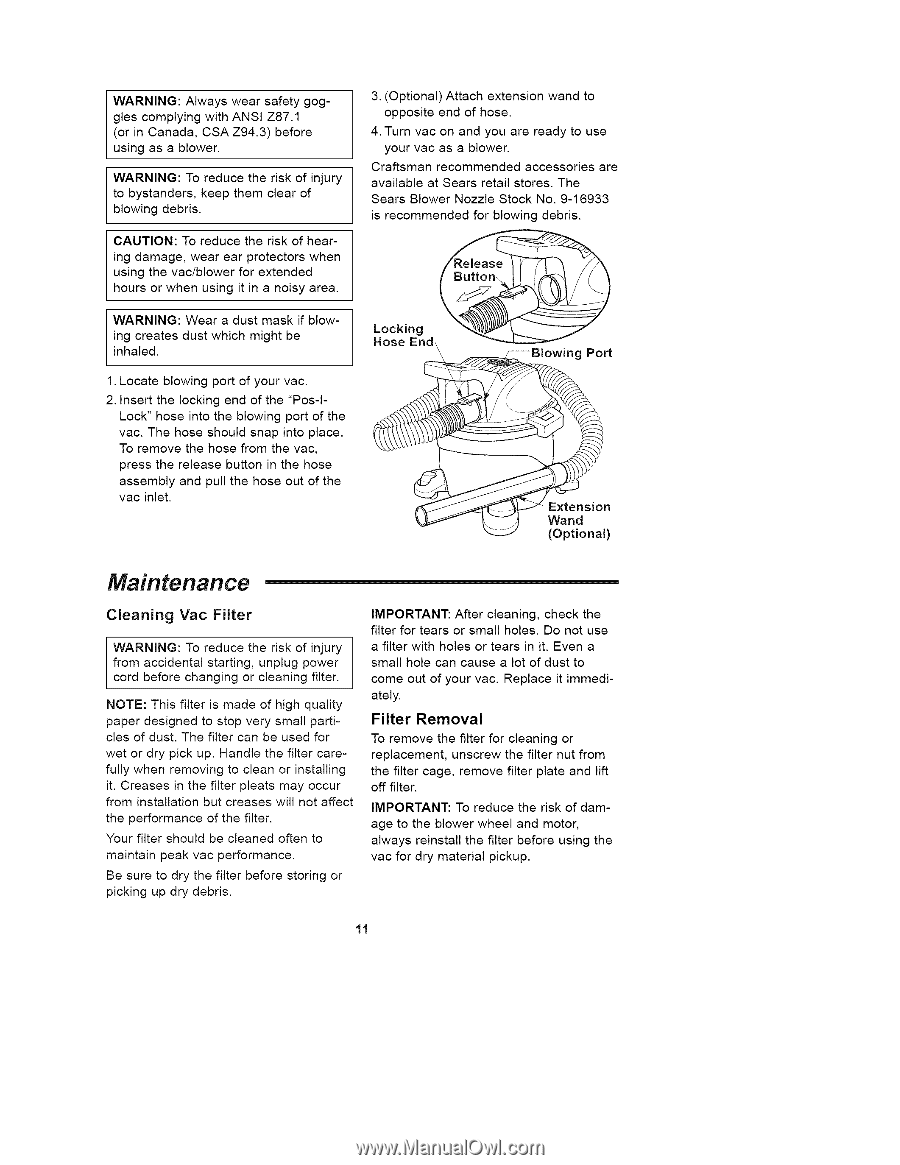
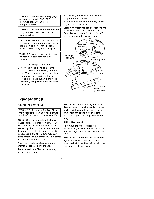
WARNING: Always wear safety goggles complying with ANSI Z87.1 (or in Canada, CSA Z94.3) before using as a blower. WARNING: To reduce the risk of injury to bystanders, keep them clear of blowing debris. CAUTION: To reduce the risk of hearing damage, wear ear protectors when using the vac/blower for extended hours or when using it in a noisy area. WARNING: ing creates inhaled. Wear a dust mask if blowdust which might be 1. Locate blowing port of your vac. 2. Insert the locking end of the "Pos-ILock" hose into the blowing port of the vac. The hose should snap into place. To remove the hose from the vac, press the release button in the hose assembly and pull the hose out of the vac inlet. 3. (Optional) Attach extension wand to opposite end of hose. 4. Turn vac on and you are ready to use your vac as a blower. Craftsman recommended accessories are available at Sears retail stores. The Sears Blower Nozzle Stock No. 9-16933 is recommended for blowing debris. Locking Hose End\ g Port Extension Wand (Optional) Maintenance Cleaning Vac Filter WARNING: To reduce the risk of injury from accidental starting, unplug power cord before changing or cleaning filter. NOTE: This filter is made of high quality paper designed to stop very small particles of dust. The filter can be used for wet or dry pick up. Handle the filter carefully when removing to clean or installing it. Creases in the filter pleats may occur from installation but creases will not affect the performance of the filter. Your filter should be cleaned often to maintain peak vac performance. Be sure to dry the filter before storing or picking up dry debris. IMPORTANT: After cleaning, check the filter for tears or small holes. Do not use a filter with holes or tears in it. Even a small hole can cause a lot of dust to come out of your vac. Replace it immediately. Filter Removal To remove the filter for cleaning or replacement, unscrew the filter nut from the filter cage, remove filter plate and lift off filter. IMPORTANT: To reduce the risk of damage to the blower wheel and motor, always reinstall the filter before using the vac for dry material pickup. 11
-
 1
1 -
2
-
3
-
4
-
5
-
 6
6 -
 7
7 -
 8
8 -
 9
9 -
 10
10 -
 11
11 -
 12
12 -
 13
13 -
 14
14 -
 15
15 -
 16
16 -
17
-
18
-
19
-
20
-
21
-
22
-
23
-
24
-
25
-
26
-
27
-
28
-
29
-
30
-
31
-
32
 |
 |