Craftsman 17925 Owners Manual - Page 7
Storage, Rack Assembly, & Mounting, cont. - wet dry vacs
 |
View all Craftsman 17925 manuals
Add to My Manuals
Save this manual to your list of manuals |
Page 7 highlights
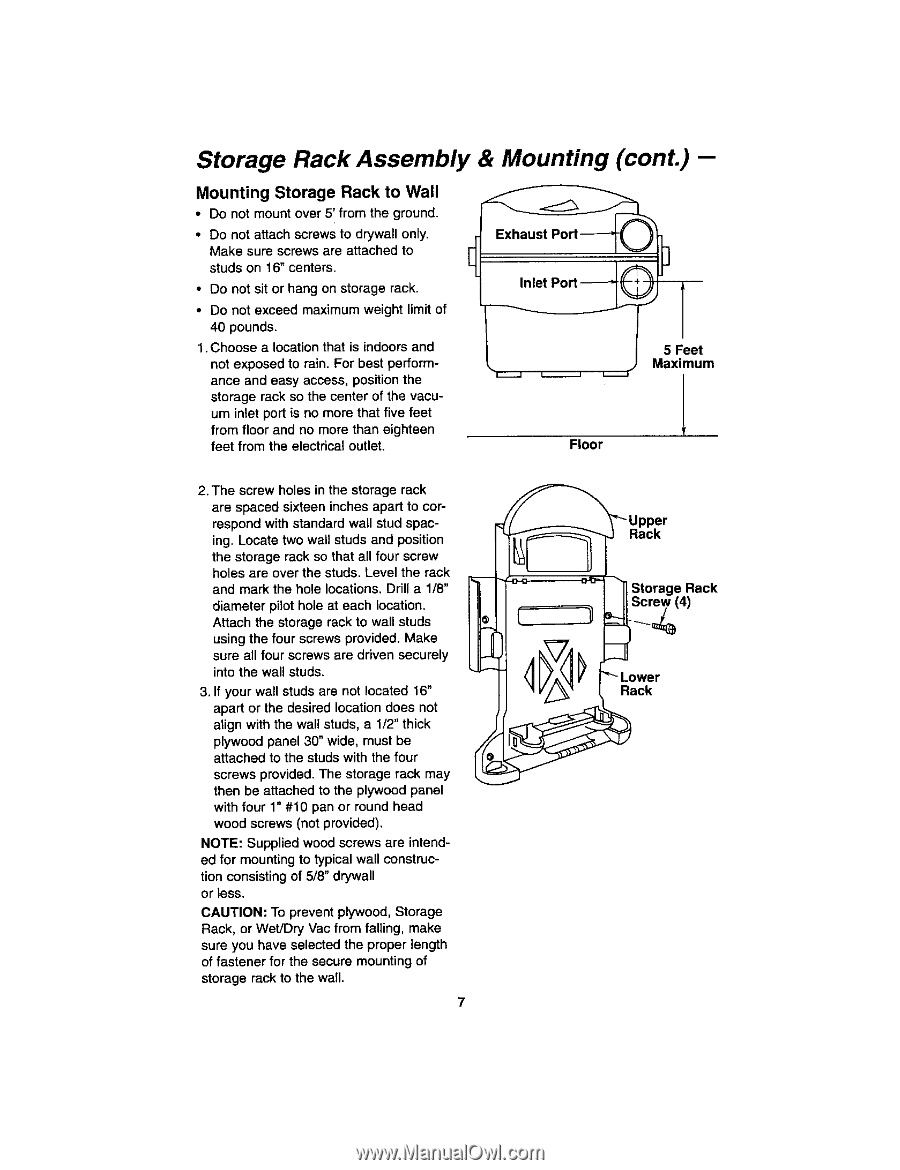
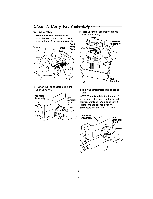
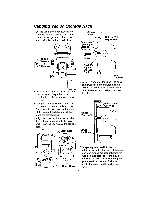
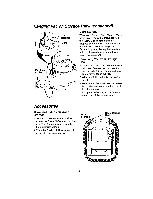
Storage Rack Assembly Mounting Storage Rack to Wail • Do not mount over 5' from the ground. • Do not attach screws to drywall only, Make sure screws are attached to studs on 16" centers. • Do not sit or hang on storage rack. • Do not exceed maximum weight limit of 40 pounds. 1. Choose a location that is indoors and not exposed to rain. For best performance and easy access, position the storage rack so the center of the vacuum inlet port is no more that five feet from floor and no more than eighteen feet from the electrical outlet. & Mounting (cont.) -- 5 Feet • _ Maximum Floor 2• The screw holes in the storage rack are spaced sixteen inches apart to correspond with standard wall stud spacing. Locate two wall studs and position the storage rack so that all four screw holes are over the studs. Level the rack and mark the hole locations. Drill a 1/8" diameter pilot hole at each Location. Attach the storage rack to wall studs using the four screws provided. Make sure all four screws are ddven securely into the wall studs. 3. If your wall studs are not located 16" apart or the desired location does not align with the wall studs, a 1/2" thick plywood panel 30" wide, must be attached to the studs with the four screws provided. The storage rack may then be attached to the plywood panel with four 1" #10 pan or round head wood screws (not provided). NOTE: Supplied wood screws are intended for mounting to typical wall construction consisting of 5/8" drywall or less, CAUTION: To prevent plywood, Storage Rack, or Wet/Dry Vac from falling, make sure you have selected the proper length of fastener for the secure mounting of storage rack to the wall. 7 _'_'Upper Rack Storage Rack Lower Rack
-
 1
1 -
 2
2 -
 3
3 -
 4
4 -
 5
5 -
 6
6 -
 7
7 -
 8
8 -
 9
9 -
 10
10 -
 11
11 -
 12
12 -
13
-
14
-
15
-
16
 |
 |