Craftsman 17925 Owners Manual - Page 8
Clean 'N Carry, Vac Assembly
 |
View all Craftsman 17925 manuals
Add to My Manuals
Save this manual to your list of manuals |
Page 8 highlights
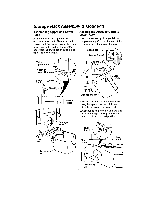
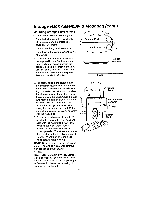
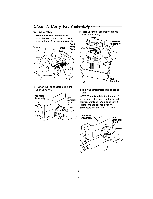
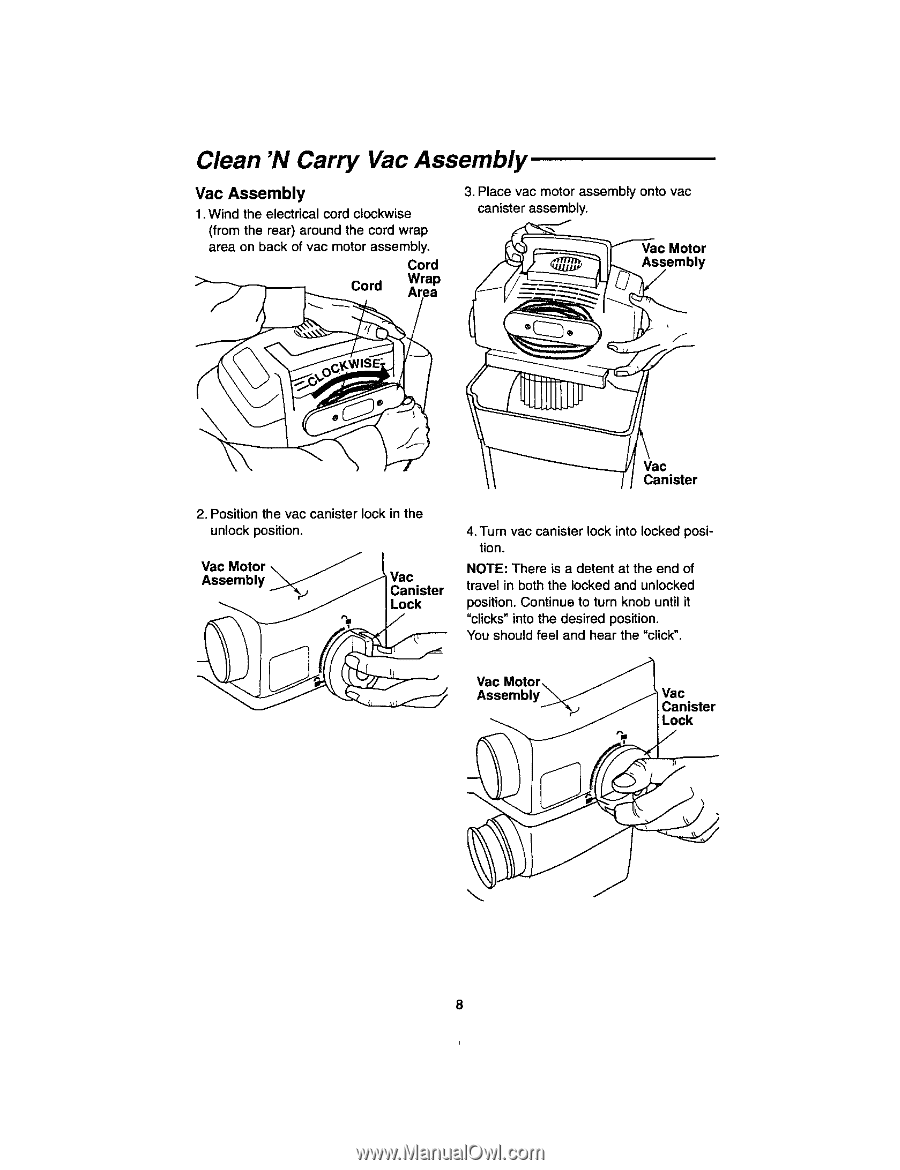
Clean 'N Carry Vac Assembly Vac Assembly 1, Wind the electdcal cord clockwise (from the rear) around the cord wrap area on back of vac motor assembly. Cord Cord Wrap Area 3. Place vac motor assembly onto vac canister assembly. Vac Motor Assembly Vac Canister 2. Position the vac canister lock in the unlock position. VacMotor\ J Assembly_ VCacnister Lock 4. Turn vac canister lock into locked position. NOTE: There is a detent at the end of travel in both the locked and unlocked position. Continue to turn knob until it "clicks" into the desired position. You should feel and hear the "click". Assembly Vac Canister Lock
-
 1
1 -
2
-
 3
3 -
 4
4 -
 5
5 -
 6
6 -
 7
7 -
 8
8 -
 9
9 -
 10
10 -
 11
11 -
 12
12 -
 13
13 -
14
-
15
-
16
 |
 |
Clean 'N Carry
Vac Assembly
Vac
Assembly
1, Wind the
electdcal
cord clockwise
(from the rear)
around
the cord wrap
area
on back of vac motor assembly.
Cord
Wrap
Cord
Area
3. Place
vac
motor assembly
onto
vac
canister
assembly.
Vac Motor
Assembly
2. Position
the
vac canister
lock in
the
unlock
position.
VacMotor\
J
Assembly_
Vac
Canister
Lock
Vac
Canister
4. Turn
vac
canister
lock
into locked
posi-
tion.
NOTE:
There
is a detent at the end of
travel in both the
locked and unlocked
position.
Continue
to turn knob until it
"clicks" into the desired
position.
You should feel and hear the "click".
Assembly
Vac
Canister
Lock