Craftsman 24594 Operation Manual - Page 4
Tools, Required, Removal, Of Parts, Carton
 |
View all Craftsman 24594 manuals
Add to My Manuals
Save this manual to your list of manuals |
Page 4 highlights
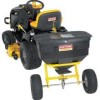
TOOLS REQUIRED FOR ASSEMBLY (!) Pliers (2) 7/16" Wrenches (2) 1/2" Wrenches (2) 9/16" Wrenches REMOVAL OF PARTS FROM CARTON Remove all parts and hardware packages from the carton. Lay out all parts and hardware and identify using the illustrations on page 3. STEP 1: (SEE FIGURE 1) 1. Turn the spreader upside down. 2. Remove lock nut from middle bolt in crossover tube and shaft support plate. Leave the bolt in place. 3. Assemble hitch tube onto middle bolt and secure it with the same lock nut you removed. DO NOT TIGHTEN YET. iMPORTANT: The hitch tube must attach to the side of the crossover tube opposite the shaft support plate. MIDDLE BOLT HITCH TUBE SHAFT SUPPORT PLATE CROSSOVER TUBE LOCK NUT FIGURE 1 STEP 2: (SEE FIGURE 2) 4. Assemble the two OUTER hitch braces to the hitch tube using a 1/4" x 1-3/4" (B) hex bolt and a 1/4" nylock hex nut (C). DO NOTTIGHTEN YET. Do not assemble the inner hitch braces at this time. HITCH (B) 1/4" x 1=3/4" HEX BOLT (C) 1/4" NYLOCK HEX NUT HITCH BRACE OUTER HITCH BRACE OUTER FIGURE 2 STEP 3: (SEE FIGURE 3) 5. Assemble a spacer (I), a 3/4" fiat washer (G), a wheel (air valve facing out) and another 3/4" fiat washer (G) onto the end of the axle that has only the small hole. 6. install a 1/8" x 1-1/2" cotter pin (E) into the hole in the axle. (I) SPACER SMALL HOLE AIR VALVE (E) 1/8" x 1-1/2" COTTER PiN (G) 3/4" FLAT WASHER FIGURE 3 4 Call 1-866-576-8388 for missing parts or assembly help DO NOT RETURN TO STORE
-
 1
1 -
 2
2 -
 3
3 -
 4
4 -
 5
5 -
 6
6 -
 7
7 -
 8
8 -
 9
9 -
 10
10 -
11
-
12
 |
 |
