Craftsman 24594 Operation Manual - Page 6
Adj Ustable, Setting, Default Position, Interference
 |
View all Craftsman 24594 manuals
Add to My Manuals
Save this manual to your list of manuals |
Page 6 highlights
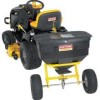
STEP 8: (SEE FIGURE 8) * Push on flow control arm until it locks in "OFF" position. * Slide flow control mounting bracket along tube until closure plate in bottom of hopper just closes. * Snug the 5/16" nylock hex nuts just enough to * hold flow control mounting bracket in place. * Set adjustable stop at "5". Pull flow control arm against stop. Verify that closure plate has opened about half way. * if closure plate does not open half way, adjust position of flow control mounting bracket until closure plate will open about half way at "5" and will still close when arm is locked in "OFF" position. Tighten the 5/16" nylock hex nuts. STEP 9: (SEE FIGURE 9) * Place screen down into hopper, sliding edge of screen under one of the clips. Slightly bow the screen to slide opposite side of the screen under other clip. © FLOW CONTROL ARM ADJ USTABLE STOP (SETTING "5") FIGURE 8 FIGURE 9 CLIPS STEP 10: (SEE FIGURE 10) * For most vehicles, you can keep the assembled hitch extension bracket in its default position shown in figure 10. Attach the spreader hitch to your vehicle hitch. Check for interference with the spreader directly behind and out to both sides of the vehicle. Lift the spreader at each position to make sure there is no interference with the spreader's flow control, if there is interference with the rear of the vehicle, assemble the hitch extension bracket as shown at the bottom of figure 10. Tighten bolts and nuts when finished. DEFAULT POSITION EXTENDED (IF INTERFERENCE) FIGURE 10 6 Call 1-868-578-8388 for missing parts or assembly help DO NOT RETURN TO STORE
-
 1
1 -
 2
2 -
 3
3 -
 4
4 -
 5
5 -
 6
6 -
 7
7 -
 8
8 -
 9
9 -
 10
10 -
 11
11 -
 12
12
 |
 |
