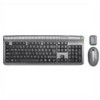
Creative Desktop Wireless 9000 Pro Creative Desktop Wireless 9000 Uses Guide E - Page 17
Step 2: Installing Software, My Computer, Autoplay - keyboard
 |
View all Creative Desktop Wireless 9000 Pro manuals
Add to My Manuals
Save this manual to your list of manuals |
Page 17 highlights
Step 2: Installing Software It is recommended that you uninstall any previously installed mouse and keyboard software, before installing the Creative Desktop Wireless 9000 Pro software. 1. Insert the installation CD into the CD-ROM drive. Your CD should start automatically. If it does not, follow the steps below: i. Start Windows Explorer. ii. On the left pane, click the My Computer icon. iii. Right-click the CD-ROM/DVD-ROM drive icon, and then click Autoplay. 2. Select the applications to install, and then click the OK button. 3. Follow the instructions on the screen to install your Creative Desktop Wireless 9000 Pro. 4. When prompted, restart your computer to complete the installation. Installing Creative Desktop Wireless 9000 Pro 3-2

Installing Creative Desktop Wireless 9000 Pro 3-2
Step 2:
Installing
Software
1.
Insert the installation CD into the CD-ROM drive. Your CD should start
automatically. If it does not, follow the steps below:
i.
Start Windows Explorer.
ii.
On the left pane, click the
My Computer
icon.
iii.
Right-click the CD-ROM/DVD-ROM drive icon, and then click
Autoplay
.
2.
Select the applications to install, and then click the
OK
button.
3.
Follow the instructions on the screen to install your Creative Desktop Wireless
9000 Pro.
4.
When prompted, restart your computer to complete the installation.
It is recommended
that you uninstall any
previously installed
mouse and keyboard
software, before
installing the Creative
Desktop Wireless
9000 Pro software.


