Cub Cadet 3X 26 inch TRAC Operation Manual - Page 23
Service And Maintenance
 |
View all Cub Cadet 3X 26 inch TRAC manuals
Add to My Manuals
Save this manual to your list of manuals |
Page 23 highlights
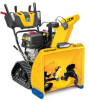
SERVICE AND MAINTENANCE WARNING Before servicing, repairing or inspecting the snow blower, disengage the auger control lever. Stop the engine, remove the safety key or disconnect spark plug wire to prevent unintended starting. Troubleshooting ENGINE 1. Engine fails to start, runs erratic, skips (hesitates) or idles poorly. Refer to the Engine Operator's Manual. • Refer to the Engine Operator's Manual for engine-related troubleshooting and service. EXCESSIVE VIBRATION 1. Loose or damaged parts. • Stop engine immediately, remove safety key or disconnect spark plug wire. Check for possible damage. Tighten all nuts and bolts. Repair as needed. If the problem persists, contact an authorized service center. FAILS TO PROPEL ITSELF 1. Drive control cable in need of adjustment. • Adjust drive control cable. Refer to Drive Control on page 17. 2. Drive belt loose or damaged. • Replace drive belt. Contact an authorized Service Center. 3. Friction wheel worn. • Replace friction wheel. Refer to Friction Wheel Inspection on page 26. FAILS TO DISCHARGE SNOW 1. Chute assembly clogged. • Stop engine and immediately, remove safety key or disconnect spark plug wire. See Engine Operator's Manual. Clean chute assembly and inside of auger housing with clean-out tool. Refer to Cleaning a Clogged Chute Assembly on page 22. 2. Foreign object lodged in auger. • Stop engine and immediately, remove safety key or disconnect spark plug wire. See Engine Operator's Manual. Remove object from auger with clean-out tool. Refer to Cleaning a Clogged Chute Assembly on page 22. 3. Auger control cable in need of adjustment. • Refer to Auger Control on page 15. 4. Auger belt loose or damaged. • Refer to Auger Belt Replacement on page 25. 5. Shear pin(s) sheared. • Refer to Replacing Shear Pins on page 22. CHUTE FAILS TO EASILY ROTATE 1. Chute assembled incorrectly. • Disassemble chute control and reassemble as directed in the Assembly & Set-up section. PUSHES SNOW INSTEAD OF THROWING 1. Low/slow ground speed in wet/slushy snow 1-3" in depth. • Increase ground speed and always operate snow blower engine at FULL throttle. 2. Shear pin(s) sheared. • Refer to Replacing Shear Pins on page 22. OVERHEAD CHUTE CONTROL DOES NOT STAY STATIONARY WHILE THROWING SNOW 1. Insufficient preload applied to chute control. • Refer to Overhead Chute Control (If Equipped) on page 15. Maintenance ENGINE Refer to Engine Operator's Manual. SHAVE PLATE & SKID SHOES The shave plate and skid shoes on the bottom of the snow blower are subject to wear. They should be checked periodically and replaced when necessary. NOTE: Deluxe skid shoes (on select models) have two wear edges. When one side wears out, they can be rotated 180° to use the other edge. To remove skid shoes (Deluxe shown): 1. Remove four carriage bolts (a) and hex flange nuts (b) and flat washers (c) which secure them to the housing. 2. Rotate and reassemble new skid shoes with four carriage bolts (a) (two on each side) and hex flange nuts (b) and flat washers (c) (Figure 67). a a c Figure 67 c b b 23
-
 1
1 -
2
-
3
-
4
-
5
-
6
-
7
-
8
-
9
-
10
-
11
-
12
-
13
-
14
-
15
-
16
-
17
-
 18
18 -
 19
19 -
 20
20 -
 21
21 -
 22
22 -
 23
23 -
 24
24 -
 25
25 -
 26
26 -
 27
27 -
 28
28 -
29
-
30
-
31
-
32
-
33
-
34
-
35
-
36
-
37
-
38
-
39
-
40
-
41
-
42
-
43
-
44
-
45
-
46
-
47
-
48
-
49
-
50
-
51
-
52
-
53
-
54
-
55
-
56
-
57
-
58
-
59
-
60
-
61
-
62
-
63
-
64
-
65
-
66
-
67
-
68
-
69
-
70
-
71
-
72
-
73
-
74
-
75
-
76
-
77
-
78
-
79
-
80
 |
 |
