Cuisinart CMW-55 CMW-55 Manual - Page 8
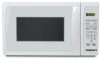
Control Panel
 |
UPC - 086279022721
View all Cuisinart CMW-55 manuals
Add to My Manuals
Save this manual to your list of manuals |
Page 8 highlights
2. Do not remove the legs from the bottom of the oven. 3. Leave a minimum clearance of 12 inches (30cm) above the oven. A minimum clearance of 3.0 (8cm) inches is required between the oven and any adjacent walls. One side must be open. 4. Remove any protective film found on the microwave oven cabinet surface. 5. Do not remove the light brown mica cover "wave guard" that is attached to the oven cavity to protect the magnetron. 6. Blocking the intake and/or outlet openings can damage the oven. 7. Operation of microwave oven may cause interference to other electronic equipment in the vicinity. 8. Plug your oven into a standard household outlet. Be sure the voltage and the frequency are the same as the voltage and the frequency on the rating label. WARNING: Do not install oven over a range cooktop or other heat-producing appliance. If improperly installed near or over a heat source, the oven could be damaged and the warranty would be void. The accessible surfaces may be hot during operation. CONTROL PANEL OPERATION 1. SETTING THE CLOCK When the microwave oven is plugged into an outlet, the LED will display 0:00. 1. Press 0/CLOCK. LED will display 00:00. 2. Press the number keys to enter the correct time as corresponding 00 is flashing. Time entered can be 1:00-12:59. For example, for 10:12, press 1, 0, 1, 2 in turn. 3. Press START/+30SEC. to confirm. Time will appear in LED. Note: To see the time of day while the timer is showing cooking time, press 0/CLOCK. To see the power level currently in use, press POWER. The LED will resume previous display after three seconds. 8
-
 1
1 -
2
-
 3
3 -
 4
4 -
 5
5 -
 6
6 -
 7
7 -
 8
8 -
 9
9 -
 10
10 -
 11
11 -
 12
12 -
 13
13 -
14
-
15
-
16
-
17
-
18
-
19
-
20
-
21
-
22
-
23
-
24
-
25
-
26
-
27
-
28
-
29
-
30
-
31
-
32
-
33
-
34
-
35
-
36
-
37
-
38
-
39
-
40
-
41
 |
 |
