Cuisinart CPC-600 User Guide - Page 3
Pressure Cooker, Settings, Instructions, For Use, Operating - locking lid
 |
UPC - 086279016058
View all Cuisinart CPC-600 manuals
Add to My Manuals
Save this manual to your list of manuals |
Page 3 highlights
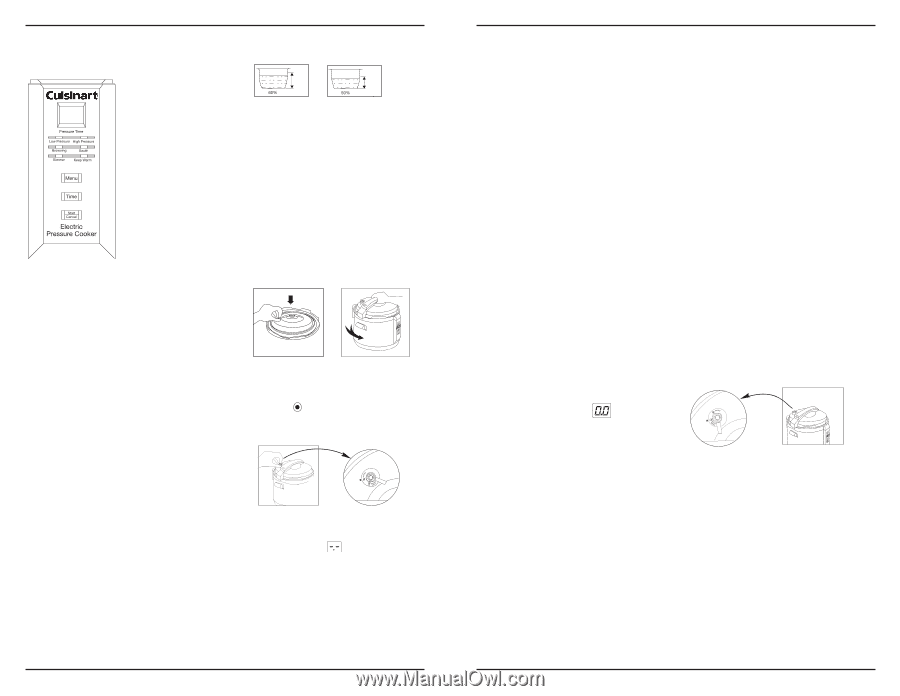
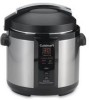
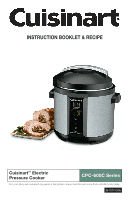
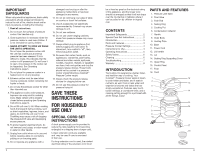
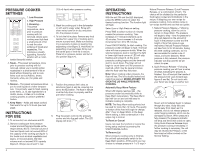
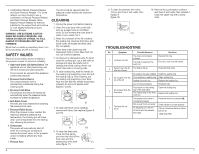
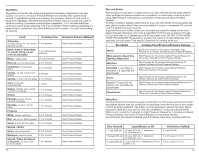
PRESSURE COOKER SETTINGS 1. Low Pressure 2. High Pressure 3. Browning - This preset temperature, done prior to pressure cooking with lid removed, allows quick cooking over high heat a small amount of fat to seal the outer surfaces of meats and vegetables. This produces a visually appealing, flavourful exterior with a moist, tender flavourful interior. 4. Sauté - This preset temperature, done prior to pressure cooking with lid removed, allows you to quickly soften vegetables in a small amount of fat or liquid without browning, and to cook items such as rice (Arborio, brown, Carnaroli, white, etc.) for pilafs and risottos. 5. Simmer - This preset temperature allows you to cook liquids at a lower temperature. It is primarily used to finish cooking some items, i.e. to add ingredients to a risotto, sauce, or stew or to continue cooking process to achieve preferred texture. 6. Keep Warm - Holds and keeps cooked food warm for up to 12 hours (see next page). INSTRUCTIONS FOR USE 1. To remove lid, turn clockwise and lift. 2. Remove cooking pot from pressure cooker and add food and liquids as the recipe directs. NOTE: The total volume of food and liquid must not exceed 60% of the capacity of the cooking pot (figure 1). For foods such as dried vegetables and beans, or rice and grains, the total volume must not exceed 50% capacity (figure 2). Always use at least ½ cup (125 ml) liquid when pressure cooking. (1) (2) 3. Wash the cooking pot in the dishwasher or with warm soapy water. Rinse with clean water, towel or air dry, and place into the pressure cooker. 4. To lock the lid in place: Remove any food residue from upper rim of cooking pot to ensure a proper seal. Make sure sealing ring is securely in place on sealing ring supporting cover (figure 3). Hold knob on supporting cover and press firmly over the centre post of inner lid to secure. Place lid on pressure cooker and turn it into position (figure 4). (3) (4) 5. Position the pressure limit valve as directed in figure 5 and 5a, ensuring it is set to the position. The float in handle must be fully down to properly seal the pot before cooking. (5) (5a) 6. Plug the power cord into the pressure cooker and into the wall outlet. The LED display will show . 4 OPERATING INSTRUCTIONS With the unit ON and the LED displayed, press the MENU button to select the desired cooking function. The function light will flash. Select Low or High Pressure setting. Press TIME to select number of minutes needed for pressure cooking. Time increases in 1-minute increments up to 40 minutes. Time increases in 5-minute increments from 40 to 99 minutes. Press START/CANCEL to start cooking. The pressure cooker will begin to heat. The float valve will rise as pressure builds. When the selected pressure level is reached, the light in lower right-hand corner of LED will stop flashing and remain lit. At this point pressure cooking begins and the timer will start to count down. The timer will not begin to count down until full pressure is reached, which may be several minutes after the float valve has fully risen. Note: When cooking under pressure, the float will rise. The lid is double locked and cannot be opened. NEVER ATTEMPT TO OPEN THE LID WHILE PRESSURE COOKING. Automatic Keep Warm Feature When LED display reaches , the pressure cooker automatically shifts to Keep Warm temperature. The Keep Warm light will turn on and unit will beep to indicate cooking is complete. NOTE: The Keep Warm setting should not be used for more than 12 hours. The quality or texture of the food will begin to change after 1 hour on Keep Warm. In the Keep Warm setting, a little condensation in the upper ring is normal. To Reset or Cancel Users can reset the function or cancel the timing setup anytime by pressing the START/CANCEL button. To Remove Lid When pressure cooking cycle is finished, the unit will automatically switch to the Keep Warm position. At this point you may choose to release pressure in 1 of 3 ways - Natural Pressure Release, Quick Pressure Release, or a combination of both. The choice will be dictated by the particular food being cooked and indications in the recipe. If adapting your own recipe for pressure cooking, find a similar recipe in our recipe booklet and use that as a guide. 1. Natural Pressure Release - Following pressure cooking, allow the unit to remain on Keep Warm. The pressure will begin to drop - time for pressure to drop will depend on the amount of liquid in the pressure cooker and the length of time that pressure was maintained. Natural Pressure Release will take from 12 to 30 minutes. During this time cooking continues, so it is recommended for certain cuts of meats, and some desserts. When pressure is fully released, the pressure indicator will drop and the lid will unlock to open. 2. Quick Pressure Release - Following pressure cooking you will hear a series of beeps indicating the process is finished. Turn off and pull the handle of the pressure limit valve forward (see figures 6 and 6a). Do not touch with your hand. Use tongs or another tool. (6) (6a) Steam will immediately begin to release through the valve. Keep face and hands away from steam as it is released, and do not release pressure under hanging cabinets, which can be damaged by steam. When pressure is fully released, the pressure indicator will drop and the lid will unlock to open. Using Quick Pressure Release stops the pressure cooking immediately. If further cooking is necessary, the unit may be returned to Pressure, or the food may be further cooked on the Simmer Setting. 5
-
 1
1 -
 2
2 -
 3
3 -
 4
4 -
 5
5 -
 6
6 -
 7
7 -
 8
8 -
 9
9 -
10
-
11
-
12
-
13
-
14
-
15
-
16
-
17
-
18
 |
 |