D-Link COVR-X1862 Product Manual 2 - Page 14
Web Based Installation
 |
View all D-Link COVR-X1862 manuals
Add to My Manuals
Save this manual to your list of manuals |
Page 14 highlights
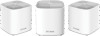
Section 2 - Installation Web Based Installation If you do not wish to use the D-Link Wi-Fi app, you can manually set up your Covr device and configure your Covr Wi-Fi network using the web-based user interface. Step 1 Position the Covr Point close to your Internet-connected modem and MODEM connect an Ethernet cable to the modem and to INTERNET Port of the Covr Point. Next, connect the power adapter and plug the Covr Point into a power outlet. Step 2 Wait for the Covr Point to boot up. When the COVR LED starts blinking Wi-Fi orange, wirelessly connect your computer to the Wi-Fi name (SSID) printed on the bottom of the device, or on the included Quick Install Card. Wi-Fi QUICK INSTALL CARD SSID: Password: Step 3 Type http://covrxxxx.local./ into a web browser and follow the on-screen instructions to complete the setup. Note: xxxx is the last four digits of the device MAC address. Please refer to the device label for the MAC address. http://covrxxxx.local./ Your Covr device is now set up and ready to use. You can now configure your Covr Wi-Fi settings using the free D-Link Wi-Fi mobile app or the web-based user interface. Refer to the Configuration section on page page 11 for more information on configuring your network using the web-based user interface. D-Link COVR-X1860 || COVR-X1862 || COVR-X1863 || COVR-X1864 User Manual 10
-
 1
1 -
2
-
3
-
4
-
5
-
6
-
7
-
8
-
 9
9 -
 10
10 -
 11
11 -
 12
12 -
 13
13 -
 14
14 -
 15
15 -
 16
16 -
 17
17 -
 18
18 -
 19
19 -
20
-
21
-
22
-
23
-
24
-
25
-
26
-
27
-
28
-
29
-
30
-
31
-
32
-
33
-
34
-
35
-
36
-
37
-
38
-
39
-
40
-
41
-
42
-
43
-
44
-
45
-
46
-
47
-
48
-
49
-
50
-
51
-
52
-
53
-
54
-
55
-
56
-
57
-
58
-
59
-
60
-
61
-
62
-
63
-
64
-
65
-
66
-
67
-
68
-
69
-
70
-
71
-
72
-
73
-
74
-
75
-
76
-
77
-
78
-
79
-
80
-
81
-
82
-
83
-
84
-
85
-
86
-
87
-
88
-
89
-
90
-
91
-
92
-
93
-
94
-
95
-
96
-
97
-
98
-
99
-
100
-
101
-
102
-
103
-
104
-
105
-
106
-
107
-
108
-
109
-
110
-
111
-
112
-
113
-
114
-
115
-
116
-
117
 |
 |
