D-Link DCS-4605EV User Manual - Page 11
Step 8, Step 7, Step 6
 |
View all D-Link DCS-4605EV manuals
Add to My Manuals
Save this manual to your list of manuals |
Page 11 highlights
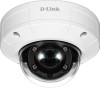
Section 2: Installation Step 6 Loosen the adjustment screw on the side of the lens assembly, then re-tighten it after adjusting the lens assembly to the desired vertical angle. The camera supports from 30° to 90° of tilt. You can also adjust the pan within a -120° to 120° range by rotating it clockwise or counterclockwise. When you are done adjusting the camera's angle, put the inner cover back into place. Note: The camera has a limited range of motion; if it stops when you are adjusting it, do not attempt to rotate or tilt the camera any further in that direction. Step 7 Use the screws provided to mount the camera to the ceiling. Step 8 Re-attach the camera cover. D-Link DCS-4605EV User Manual 11
-
 1
1 -
2
-
3
-
4
-
5
-
 6
6 -
 7
7 -
 8
8 -
 9
9 -
 10
10 -
 11
11 -
 12
12 -
 13
13 -
 14
14 -
 15
15 -
 16
16 -
17
-
18
-
19
-
20
-
21
-
22
-
23
-
24
-
25
-
26
-
27
-
28
-
29
-
30
-
31
-
32
-
33
-
34
-
35
-
36
-
37
-
38
-
39
-
40
-
41
-
42
-
43
-
44
-
45
-
46
-
47
-
48
-
49
-
50
-
51
-
52
-
53
-
54
-
55
-
56
-
57
-
58
-
59
-
60
-
61
-
62
-
63
-
64
-
65
-
66
-
67
-
68
-
69
-
70
-
71
-
72
-
73
-
74
-
75
-
76
-
77
-
78
-
79
-
80
-
81
-
82
-
83
-
84
-
85
-
86
-
87
-
88
-
89
-
90
-
91
-
92
-
93
 |
 |

11
D-Link DCS-4605EV User Manual
Section 2: Installation
Step 8
Re-attach the camera cover.
Step 7
Use the screws provided to mount the camera to the ceiling.
Step 6
Loosen the adjustment screw on the side of the lens assembly, then re-tighten it after adjusting
the lens assembly to the desired vertical angle. The camera supports from 30° to 90° of tilt.
You can also adjust the pan within a -120° to 120° range by rotating it clockwise or counter-
clockwise.
When you are done adjusting the camera's angle, put the inner cover back into place.
Note
: The camera has a limited range of motion; if it stops when you are adjusting it, do not
attempt to rotate or tilt the camera any further in that direction.