D-Link DES-3026 Reference Manual - Page 61
DES-3000 Series Layer 2 Switch CLI Reference Manual, download, configuration - d link des switch
 |
UPC - 790069280771
View all D-Link DES-3026 manuals
Add to My Manuals
Save this manual to your list of manuals |
Page 61 highlights
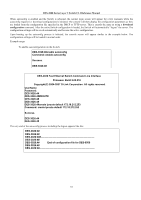
DES-3000 Series Layer 2 Switch CLI Reference Manual When autoconfig is enabled and the Switch is rebooted, the normal login screen will appear for a few moments while the autoconfig request (i.e. download configuration) is initiated. The console will then display the configuration parameters as they are loaded from the configuration file specified in the DHCP or TFTP server. This is exactly the same as using a download configuration command. After the entire Switch configuration is loaded, the Switch will automatically "logout" the server. The configuration settings will be saved automatically and become the active configuration. Upon booting up the autoconfig process is initiated, the console screen will appear similar to the example below. The configuration settings will be loaded in normal order. Example usage: To enable autoconfiguration on the Switch: DES-3026:4#enable autoconfig Command: enable autoconfig Success. DES-3026:4# DES-3026 Fast Ethernet Switch Command Line Interface Firmware: Build 2.00.016 Copyright(C) 2004-2007 D-Link Corporation. All rights reserved. UserName: Password: DES-3026:4# DES-3026:4##ROUTE DES-3026:4# DES-3026:4# DES-3026:4#create iproute default 172.18.212.253 Command: create iproute default 172.18.212.253 Success. DES-3026:4# DES-3026:4# The very end of the autoconfig process including the logout appears like this: DES-3026:4# DES-3026:4# DES-3026:4 DES-3026:4# DES-3026:4# End of configuration file for DES-6500 DES-3026:4# DES-3026:4 57
-
 1
1 -
2
-
3
-
4
-
5
-
6
-
7
-
8
-
9
-
10
-
11
-
12
-
13
-
14
-
15
-
16
-
17
-
18
-
19
-
20
-
21
-
22
-
23
-
24
-
25
-
26
-
27
-
28
-
29
-
30
-
31
-
32
-
33
-
34
-
35
-
36
-
37
-
38
-
39
-
40
-
41
-
42
-
43
-
44
-
45
-
46
-
47
-
48
-
49
-
50
-
51
-
52
-
53
-
54
-
55
-
 56
56 -
 57
57 -
 58
58 -
 59
59 -
 60
60 -
 61
61 -
 62
62 -
 63
63 -
 64
64 -
 65
65 -
 66
66 -
67
-
68
-
69
-
70
-
71
-
72
-
73
-
74
-
75
-
76
-
77
-
78
-
79
-
80
-
81
-
82
-
83
-
84
-
85
-
86
-
87
-
88
-
89
-
90
-
91
-
92
-
93
-
94
-
95
-
96
-
97
-
98
-
99
-
100
-
101
-
102
-
103
-
104
-
105
-
106
-
107
-
108
-
109
-
110
-
111
-
112
-
113
-
114
-
115
-
116
-
117
-
118
-
119
-
120
-
121
-
122
-
123
-
124
-
125
-
126
-
127
-
128
-
129
-
130
-
131
-
132
-
133
-
134
-
135
-
136
-
137
-
138
-
139
-
140
-
141
-
142
-
143
-
144
-
145
-
146
-
147
-
148
-
149
-
150
-
151
-
152
-
153
-
154
-
155
-
156
-
157
-
158
-
159
-
160
-
161
-
162
-
163
-
164
-
165
-
166
-
167
-
168
-
169
-
170
-
171
-
172
-
173
-
174
-
175
-
176
-
177
-
178
-
179
-
180
-
181
-
182
-
183
-
184
-
185
-
186
-
187
-
188
-
189
-
190
-
191
-
192
-
193
-
194
-
195
-
196
-
197
-
198
-
199
-
200
-
201
-
202
-
203
-
204
-
205
-
206
-
207
-
208
-
209
-
210
-
211
-
212
-
213
-
214
-
215
-
216
-
217
-
218
 |
 |
