D-Link DIS-3650AP Quick Install Guide - Page 7
Installation for DIN Rail
 |
View all D-Link DIS-3650AP manuals
Add to My Manuals
Save this manual to your list of manuals |
Page 7 highlights
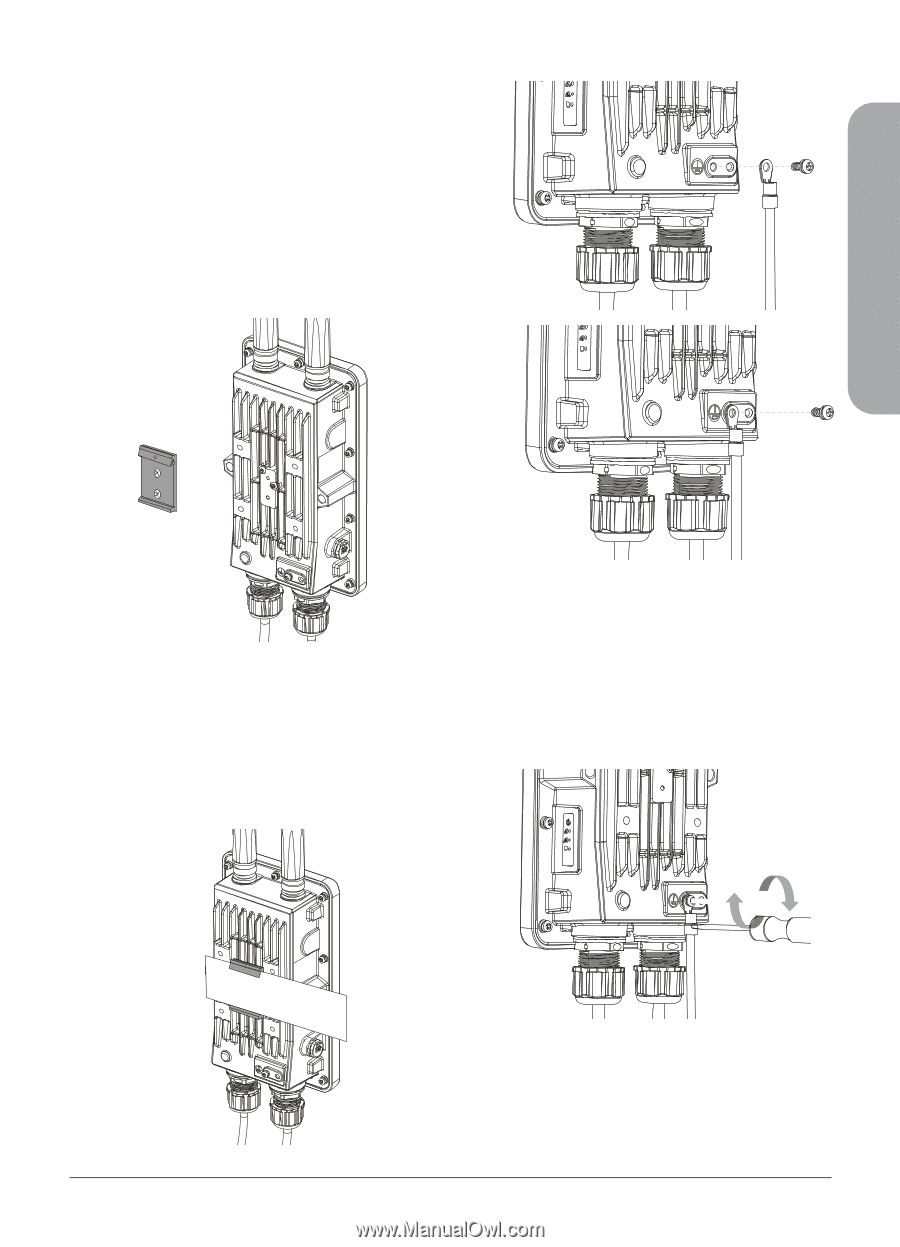
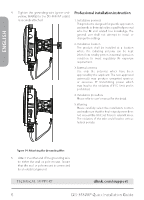
Installation for DIN Rail The DIS-3650AP can be mounted on a standard DIN rail using the included DIN mounting kit. Use the following instructions to install the DIS3650AP on a rail: 1. Install a Din rail kit on enclosure. Check that the DIN rail kit is installed properly using two screws on each end. ENGLISH Figure 12: Attaching the Grounding Wire 3. A grounding wire is to protect your device Figure 10 from lightning strikes and the buildup of static electricity. Attach the grounding 2. Position the DIS-3650AP against the rail, then tilt it upwards and hook the DIN rail wire to the DIS-3650AP using the included screw(M3.9 * 7.8 mm). clip on the back of the device against the rail. Snap the device into place to complete the installation. Figure 13: Attaching the Grounding Wire Figure 11 DIS-3650AP Quick Installation Guide 5
-
 1
1 -
 2
2 -
 3
3 -
 4
4 -
 5
5 -
 6
6 -
 7
7 -
 8
8 -
 9
9 -
 10
10 -
 11
11 -
 12
12 -
13
-
14
-
15
-
16
 |
 |