D-Link DKVM-4 Product Manual - Page 7
Step 7, work after the system has booted up. If this is OK, use - manual
 |
UPC - 790069232305
View all D-Link DKVM-4 manuals
Add to My Manuals
Save this manual to your list of manuals |
Page 7 highlights
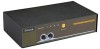
the connector with the keyboard symbol on the rear panel of the DKVM-2/4 unit. Repeat this for all PCs. Step 7. Now make sure to verify all cables. In particular, keyboard and mouse cables should be checked because they are easily switched and they use the same type of connector. Step 8. Attach the power supply to the DKVM-2/4 unit and plug it into a power outlet. You will see the LED for Port 1 light up, and you will hear a beep. Switch on your monitor. Step 9. Now power up all computers simultaneously. The first computer that is connected to port PC1 will be shown on the monitor. You may check to see if the mouse and keyboard work after the system has booted up. If this is OK, use the "Select" button to choose the next computer and verify the functionality in the same way. If you find errors, re-check all cables for proper connections before going to the troubleshooting section of this manual. 5
-
 1
1 -
 2
2 -
 3
3 -
 4
4 -
 5
5 -
 6
6 -
 7
7 -
 8
8 -
 9
9 -
 10
10 -
 11
11 -
 12
12 -
13
-
14
-
15
-
16
-
17
-
18
-
19
-
20
-
21
-
22
 |
 |
