D-Link DKVM-4K Product Manual - Page 6
Step 4, Male / Male to the PC and to the connector with the mouse
 |
UPC - 790069263729
View all D-Link DKVM-4K manuals
Add to My Manuals
Save this manual to your list of manuals |
Page 6 highlights
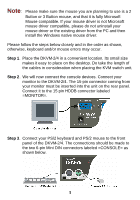
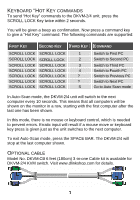
Step 4. Now the PC connections will be made with the monitor (VGA) connections. Connect a VGA cable (15-pin HDDB Male / Male) with the Male side to both the PC and to the connector labeled VGA on the rear panel of the DKVM-2/4 unit. Repeat this for all PCs. Step 5. Now connect the PS/2 mouse cables from your computers to the DKVM-2/4 unit. Connect a mouse cable (6-pin Mini DIN Male / Male) to the PC and to the connector with the mouse symbol on the rear panel of the DKVM-2/4 unit. Repeat this for all PCs. Step 6. To finish the hardware installation, connect the PS/2 keyboard cables from your computers to the DKVM-2/4 unit. Connect a keyboard cable (6-pin Mini DIN Male / Male) to the PC and to 4
-
 1
1 -
 2
2 -
 3
3 -
 4
4 -
 5
5 -
 6
6 -
 7
7 -
 8
8 -
 9
9 -
 10
10 -
 11
11 -
 12
12 -
13
-
14
-
15
-
16
-
17
-
18
-
19
-
20
-
21
-
22
 |
 |

4
Step 4
. Now the PC connections will be made with the monitor (VGA)
connections. Connect a VGA cable (15-pin HDDB Male /
Male) with the Male side to both the PC and to the connector
labeled VGA on the rear panel of the DKVM-2/4 unit. Repeat
this for all PCs.
Step 5
. Now connect the PS/2 mouse cables from your computers to
the DKVM-2/4 unit. Connect a mouse cable (6-pin Mini DIN
Male / Male) to the PC and to the connector with the mouse
symbol on the rear panel of the DKVM-2/4 unit. Repeat this for
all PCs.
Step 6
. To finish the hardware installation, connect the PS/2 keyboard
cables from your computers to the DKVM-2/4 unit. Connect a
keyboard cable (6-pin Mini DIN Male / Male) to the PC and to