D-Link DS-810 User Guide - Page 24
Installing on a Desktop or Shelf
 |
View all D-Link DS-810 manuals
Add to My Manuals
Save this manual to your list of manuals |
Page 24 highlights
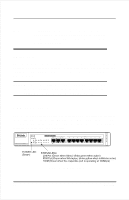
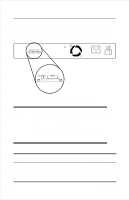
For a detailed list of the product's technical specifications, refer to Appendix A, Specifications. Installing on a Desktop or Shelf When installing the product you need to attach the rubber feet included with the device. Attach these cushioning feet on the bottom at each corner of the device. Allow enough ventilation space between the device and the objects around it. Figure 4 Installing the 10/100 Fast Ethernet Switch on a Table Note: If you would like to install the hub in a standard network equipment rack, an optional rack mount bracket kit is available through your dealer. 14 Installation
-
 1
1 -
2
-
3
-
4
-
5
-
6
-
7
-
8
-
9
-
10
-
11
-
12
-
13
-
14
-
15
-
16
-
17
-
18
-
 19
19 -
 20
20 -
 21
21 -
 22
22 -
 23
23 -
 24
24 -
 25
25 -
 26
26 -
 27
27 -
 28
28 -
 29
29 -
30
-
31
-
32
-
33
-
34
-
35
-
36
-
37
-
38
 |
 |

14
Installation
For a detailed list of the product’s technical specifications, refer to Appendix
A,
Specifications.
Installing on a Desktop or Shelf
When installing the product you need to attach the rubber feet included with
the device. Attach these cushioning feet on the bottom at each corner of the
device. Allow enough ventilation space between the device and the objects
around it.
Figure 4
Installing the 10/100 Fast Ethernet Switch on a Table
Note:
If you would like to install the hub in a standard
network equipment rack, an optional rack
mount bracket kit is available through your
dealer.