DIRECTV RC32 User Manual - Page 10
Verifying the Codes, Changing Volume Lock - universal remote
 |
View all DIRECTV RC32 manuals
Add to My Manuals
Save this manual to your list of manuals |
Page 10 highlights
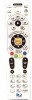
COMPONENT TYPE Satellite TV VCR/DVD/PVR Stereo COMPONENT ID # 0 1 2 3 5. Press PWR, or other functions (e.g. PLAY for VCR) you want to use. 6. Point the remote at the TV or component and press CHAN+. Repeatedly press CHAN+ until the TV or component turns off. NOTE: Every time CHAN+ is pressed the remote advances to the next code and power is transmitted to the component. 7. Use the CHAN- key to step back a code. 8. When the TV or component turns off, stop pressing the CHAN+ key. Then, press and release the SELECT key. NOTE: If the light flashes 3 times before the TV or component responds, you've cycled through all codes and the code you need is not available. You must use the remote that came with your TV or component. Verifying the Codes Once you have set up the DIRECTV Universal Remote Control using the above steps, use the following instructions to find out the 5-digit code to which your component responded: 1. Slide the MODE switch to the appropriate position. 2. Press and hold the MUTE and SELECT keys at the same time until the green light under the selected switch position flashes twice, then release both keys. 3. Enter 9-9-0. (The green light under the selected switch position flashes twice.) 4. To view the first digit in the code, Press and release then number 1 key. Wait three seconds, and count the number of times the green light flashes. Write this number down in the leftmost TV, AV1 or AV2 code box found on page 9. 5. Repeat step 4 four more times for the remaining digits; i.e., press number 2 for the second digit, 3 for the third digit, 4 for the fourth digit and 5 for the final digit. CHANGING VOLUME LOCK Depending on how you set up your remote, the VOL and MUTE may control the volume only on your TV, regardless of the position of the MODE switch. This remote can be set up so that the VOL and MUTE keys work only with the 10
-
 1
1 -
2
-
3
-
4
-
 5
5 -
 6
6 -
 7
7 -
 8
8 -
 9
9 -
 10
10 -
 11
11 -
 12
12 -
 13
13 -
 14
14 -
 15
15 -
16
-
17
-
18
-
19
-
20
-
21
-
22
-
23
-
24
-
25
-
26
-
27
-
28
-
29
-
30
-
31
-
32
-
33
-
34
-
35
-
36
 |
 |
