DIRECTV Sat-Go Owners Manual - Page 21
Guided Setup and Activation
 |
View all DIRECTV Sat-Go manuals
Add to My Manuals
Save this manual to your list of manuals |
Page 21 highlights
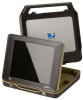
Setting Up Your DIRECTV® Sat-Go Guided Setup and Activation Now that your DIRECTV Sat-Go is hooked up and plugged in, you're ready to finish all the details to begin receiving your DIRECTV® service. 1 Make sure the MODE SWITCH on the remote control is set to DIRECTV. 2 Press TV POWER ON. The DIRECTV Sat-Go TV will turn on. 3 Simply follow the onscreen directions to complete your setup functions. You'll be guided though various selections and functions for setting up and optimizing your antenna signal and setup - including positioning your antenna and a system test. Throughout the remainder of the Guided Setup, use the arrow keys on the remote control to move to an option or desired selection and then press SELECT. a Select the desired language and press SELECT. b Select antenna type Round Dish and press SELECT. c Enter the ZIP Code for your location and press SELECT. d Align the antenna, see "Aligning the Antenna" on page 25. e Select Continue and proceed through the remainder of the Guided Setup. 4 Once completed, you will see a Welcome screen and now you're ready to watch TV. Important: In order to protect your TV screen from burn-in (a side-effect caused when a stationary image is displayed for too long), the DIRECTV Sat-Go system interface automatically goes into screen saver mode, and displays a black screen with a moving logo when no key is pressed for 5 minutes or more while a stationary image is displayed on the TV. To dismiss the screen saver and return to what you were doing, press any key on the remote. Burn-in may cause permanent damage to your TV and DIRECTV is not liable for any damages that may be caused to your TV. 20
-
 1
1 -
2
-
3
-
4
-
5
-
6
-
7
-
8
-
9
-
10
-
11
-
12
-
13
-
14
-
15
-
 16
16 -
 17
17 -
 18
18 -
 19
19 -
 20
20 -
 21
21 -
 22
22 -
 23
23 -
 24
24 -
 25
25 -
 26
26 -
27
-
28
-
29
-
30
-
31
-
32
-
33
-
34
-
35
-
36
-
37
-
38
-
39
-
40
-
41
-
42
-
43
-
44
-
45
-
46
-
47
-
48
-
49
-
50
-
51
-
52
-
53
-
54
-
55
-
56
-
57
-
58
-
59
-
60
-
61
-
62
-
63
-
64
-
65
 |
 |
