Dacor DCM24 Installation Instructions - Page 5
Installation Instructions - trim kit
 |
View all Dacor DCM24 manuals
Add to My Manuals
Save this manual to your list of manuals |
Page 5 highlights
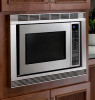
INSTALLATION INSTRUCTIONS Unpacking and Examining Your Oven Remove all packing materials from inside the oven cavity; however, DO NOT REMOVE THE WAVEGUIDE COVER, which is located on the ceil- ing. Read enclosures and SAVE the Operation Manual. Check the oven for any damage, such as misaligned or bent door, damaged door seals and sealing surfaces, broken or loose door hinges and latches and dents inside the cavity or on the door. If there is any damage, do not operate the oven and contact your dealer or DACOR AUTHORIZED SERVICER. Choosing a Location for Your Oven on the counter You will use the oven frequently so plan its location for ease of use. It's wise, if possible, to have counter space on at least one side of the oven. The oven must be placed on a counter top which is a minimum of 36 inches from the floor. Allow at least 2 inches on the sides, top and at the rear of the oven for air circulation. Be sure to position oven so that the rear cannot be touched inadvertently. Choosing a Location for Your Oven if built-in Your oven can be built into a cabinet or wall by itself or above any DACOR wall oven listed below using DACOR's Built-in Kits, either the ACTK27 or the ACTK30. The ACTK27 is for a 27" wall oven, while the ACTK30 accommodates installation above 30" wall ovens. The applicable wall ovens and warming ovens are as follows: OVENS - ECS127, ECS130, MCS127, MCS130, PCS127, PCS130 WARMING OVENS - EWO24, EWO27, EWO30, MWO27, MWO30, PWO24, PWO27, PWO30, IWO24, IWO27 Do not built-in above any other gas or electric wall oven. ABOVE WARMING OVEN INSTALLATION MICROWAVE CUTOUT RECOMMENDED HEIGHT 36" (914MM) 1 1/4" (32MM) WARMING OVEN CUTOUT (ALL MODELS) Carefully follow both the wall oven installation instructions and Built-in Kit instructions. The opening in the wall or cabinet must be the following dimensions: A HEIGHT B WIDTH C DEPTH : 19 1/8 " : 25 1/4 " (ACTK27) 28 1/4 " (ACTK30) : 24 " The electrical outlet should NOT be in the shaded area as indicated. The floor of the opening should be constructed of plywood strong enough to support the weight of the oven and floor load (about 100 pounds). The floor should be level for proper operation of the oven. Be sure to check the local building code as it may require that the opening be enclosed with sides, ceiling and rear partition. The proper functioning of the oven does not require the enclosure. D E A ABOVE OVEN INSTALLATION MICROWAVE CUTOUT TOP OF MICROWAVE SHELF 1 1/2" (38MM) 41" (1041MM) EPICURE, PREFERENCE AND MILLENNIA SINGLE WALL OVEN CUTOUT B C D :5" E : 10" (ACTK27) : 11 1/2" (ACTK30) Call toll-free: (800) 793-0093 for a dealer nearest you. The kit includes ducts, finish trim strips and easy-tofollow instructions for installation as well as the location of the power supply. 3
-
 1
1 -
 2
2 -
 3
3 -
 4
4 -
 5
5 -
 6
6 -
 7
7 -
 8
8 -
 9
9 -
 10
10 -
 11
11 -
12
-
13
-
14
-
15
-
16
-
17
-
18
-
19
-
20
-
21
-
22
-
23
-
24
-
25
-
26
-
27
-
28
-
29
-
30
-
31
-
32
 |
 |
