Dacor DR30G Installation Instructions
Dacor DR30G Manual
 |
View all Dacor DR30G manuals
Add to My Manuals
Save this manual to your list of manuals |
Dacor DR30G manual content summary:
- Dacor DR30G | Installation Instructions - Page 1
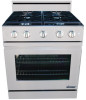
Installation Instructions Distinctive™ 30-Inch Gas Range For use with models DR30GS, DR30GFS, DR30GIS and DR30GIFS Part No. 105908 Rev. A THIS APPLIANCE HAS BEEN TESTED IN ACCORDANCE WITH THE LATEST EDITION OF ANSI Z21.1a-2011 STANDARD FOR HOUSEHOLD GAS COOKING APPLIANCES. - Dacor DR30G | Installation Instructions - Page 2
Information If You Need Help... If you have questions or problems with installation, contact your Dacor ® dealer or the Dacor Customer Service Team. For repairs to Dacor appliances under warranty, call the Dacor Distinctive Service line. Whenever you call, have the model and serial number of - Dacor DR30G | Installation Instructions - Page 3
Instructions The Important Safety Instructions and warnings in this manual are not meant to cover all possible problems and conditions that can occur. Use common sense and caution when installing, maintaining or operating this appliance. Always contact the Dacor Customer Service Team about problems - Dacor DR30G | Installation Instructions - Page 4
while climbing on the appliance. • Do not attempt to use this appliance in the event of a power failure. • Do not tamper with the controls. Do not adjust or alter any part of the range unless specifically instructed to do so in these instructions. • Clean the cooktop thoroughly before operating it - Dacor DR30G | Installation Instructions - Page 5
the oven. The lens cover protects the light bulb from breakage caused by high oven temperatures or mechanical shock. IMPORTANT - This appliance GFI). WARNING TO REDUCE THE RISK OF INJURY TO PERSONS IN THE EVENT OF A RANGE TOP GREASE FIRE: a. SMOTHER FLAMES with a close-fitting lid, cookie sheet or - Dacor DR30G | Installation Instructions - Page 6
Backguards Part Number AER30GLBG AERB30G03 AERB30G06 AERB30G09 Description Low profile (1 3/4 inch) 3 Inch 6 Inch 9 Inch Compatibility Standard on models DR30GIS, DR30GIFS Optional on models DR30GS, DR30GFS Optional on models DR30GS, DR30GFS NOT compatible with models DR30GIS, DR30GIFS Standard - Dacor DR30G | Installation Instructions - Page 7
24, HUD (Part 280)] or with local codes where applicable. • This range is not service being provided (natural gas or LP gas). • An external manual shut-off valve must be installed between the gas inlet and the range for the purpose of turning on or shutting off gas to the appliance. • The range - Dacor DR30G | Installation Instructions - Page 8
the room, Dacor strongly recommends installing a range hood. A range hood should appliance or in the floor underneath it must be sealed. Freestanding Installation Cabinet Cutout Dimensions - Models DR30GS, DR30GFS, DR30GIS and DR30GIFS 1 30" (76.2 cm) min. vertical clearance from top of range - Dacor DR30G | Installation Instructions - Page 9
Specifications Self-Rimming Installation Cutout Options (Models DR30GIS and DR30GIFS Only) For all self-rimming installations: Countertop cm) from rear wall. ** Models DR30GIS and DR30GIS include self-rimming trim piece that attaches to back of range and covers the edge of the countertop - Dacor DR30G | Installation Instructions - Page 10
range can be pulled out for service while the appliance oven racks • Rear self-rimming trim piece (DR30GIS/DR30GIFS only) • 2 #8 x 1/4 Torx screws (DR30GIS/DR30GIFS only only) 8 Installing the Anti-Tip Bracket Locate the anti-tip bracket included in the parts be attached as instructed to the concrete - Dacor DR30G | Installation Instructions - Page 11
Installation Instructions Four (4) plastic anchors are provided along with three sizes (4 each) Screws attached to sub-floor below floor covering 1. Determine the location of the range center line and front panel when the range is in its final position based on the Product Dimensions on page 4 and - Dacor DR30G | Installation Instructions - Page 12
support part numbers and compatibility. If installing a backguard other than the standard size, install it before pushing the range into place. Install the kit according to the accompanying installation instructions. A T-20 Torx driver is required. Rear Trim Piece Installation (Model DR30GIS/DR30GIFS - Dacor DR30G | Installation Instructions - Page 13
Installation Instructions Adjust the Range Height 1. For stand alone configurations, raise the range until the top of the trim around the cooktop is at least the same height as the countertop. For self-rimming configurations, raise the range until the bottom of the trim surrounding the cooktop is - Dacor DR30G | Installation Instructions - Page 14
lines for leaks as instructed before use. If a appliance. Ranges intended for use with LP gases will have "LP" as a part of the model number. Consult your dealer if the range range to be pulled out for service. 3. Connect the gas line to the regulator on the back of the range. 4. Turn all cooktop - Dacor DR30G | Installation Instructions - Page 15
hinge rests on top of the lower lip of each hinge receptacle before attempting to open the oven door. • Rotate the hinge locks toward the front of the range immediately after installation of the door. 1. Grasp the oven door on opposite sides and hold it at a 15° angle from the front of the - Dacor DR30G | Installation Instructions - Page 16
Installation Instructions Cooktop Assembly WARNING Never attempt to operate the range's cooktop with any of the burner rings, burner caps or grates removed. 1. Remove the burner rings, burner caps and grates from their shipping cartons. 2. Install the - Dacor DR30G | Installation Instructions - Page 17
work, contact Dacor Distinctive Service at (800) 793-0093 ex. 2822. Do not attempt to repair the appliance yourself. Dacor is not responsible for the cost of correcting problems caused by a faulty installation. continued... Normal Flame 5. Repeat ignition test for the remaining cooktop burners - Dacor DR30G | Installation Instructions - Page 18
? See page 5. □□ Is the range connected to the gas supply according to these instructions and in accordance with all applicable codes? See pages 5 and 12. □□ Did the installer check the gas supply for leaks? □□ Is the oven door properly installed according to these instructions? See page 13. □□ Are - Dacor DR30G | Installation Instructions - Page 19
- Dacor DR30G | Installation Instructions - Page 20
Dacor ● 14425 Clark Avenue, City of Industry, CA 91745 ● Phone: (800) 793-0093 ● Fax: (626) 403-3130 ● www.dacor.com
-
 1
1 -
 2
2 -
 3
3 -
 4
4 -
 5
5 -
 6
6 -
 7
7 -
8
-
9
-
10
-
11
-
12
-
13
-
14
-
15
-
16
-
17
-
18
-
19
-
20
 |
 |

Installation Instructions
Distinctive
™
30-Inch Gas Range
Part No. 105908
Rev. A
THIS APPLIANCE HAS BEEN TESTED IN ACCORDANCE WITH THE LATEST EDITION
OF ANSI Z21.1a-2011 STANDARD FOR HOUSEHOLD GAS COOKING APPLIANCES.
For use with models DR30GS, DR30GFS, DR30GIS and DR30GIFS