Dacor DR30G Installation Instructions - Page 2

Table of Contents, Customer Service Information - dr30gs

Page 2 highlights

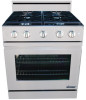
Table of Contents Important Safety Instructions 1 Important Information About Safety Instructions 1 General Safety Precautions 2 Installation Specifications 4 Product Dimensions 4 Electrical Power Supply Requirements 5 Gas Supply Requirements 5 Cabinet Layout 6 Gas and Electrical Locations 8 Installation Instructions 8 Verifying the Package Contents 8 Parts List 8 Installing the Anti-Tip Bracket 8 Backguard Kit Installation 10 Rear Trim Piece Installation 10 Adjust the Range Height 11 Door Removal 11 Gas Connection 12 Moving the Range to Final Location 13 Re-Installing the Door 13 Cooktop Assembly 14 Verifying Proper Operation 15 Installation Checklist 16 IMPORTANT: • Installer: In the interest of safety and to minimize problems, read these installation instructions completely and carefully before you begin the installation process. Leave these installation instructions with the customer. • Customer: Keep these installation instructions for future reference and the local building inspector's use. Customer Service Information If You Need Help... If you have questions or problems with installation, contact your Dacor ® dealer or the Dacor Customer Service Team. For repairs to Dacor appliances under warranty, call the Dacor Distinctive Service line. Whenever you call, have the model and serial number of the appliance ready. See diagram below for product data label location. Dacor Customer Service Phone: (800) 793-0093 ex. 2813 (U.S.A. and Canada) Monday - Friday 6:00 a.m. to 5:00 p.m. PST Web site: www.dacor.com Dacor Distinctive Service (for repairs under warranty only) Phone: (800) 793-0093 ex. 2822 (U.S.A. and Canada) Monday - Friday 6:00 a.m. to 5:00 p.m. PST Model Identification DR30G I FS/NG/H SIZE (inches) TRIM TYPE I = Island trim No character = Freestanding HANDLE TYPE F = Flush handle, integrated in door No character = Handle mounted on outside of door GAS TYPE NG = Natural gas LP = Liquid petroleum (propane) ALTITUDE H = Equipped for high altitude operation, 4000 ft. (1219 m) and up No character = Equipped for low altitude operation Product data label (view through right side of grate with flashlight) All specifications subject to change without notice. Dacor assumes no liability for changes to specifications. © 2012 Dacor, all rights reserved.

  • 1
  • 2
  • 3
  • 4
  • 5
  • 6
  • 7
  • 8
  • 9
  • 10
  • 11
  • 12
  • 13
  • 14
  • 15
  • 16
  • 17
  • 18
  • 19
  • 20

Table of Contents
Customer Service Information
IMPORTANT:
Installer
: In the interest of safety and to minimize problems, read these installation instructions completely and
carefully before you begin the installation process. Leave these installation instructions with the customer.
Customer
: Keep these installation instructions for future reference and the local building inspector’s use.
If You Need Help...
If you have questions or problems with installation, contact
your Dacor
®
dealer or the Dacor Customer Service Team.
For repairs to Dacor appliances under warranty, call the
Dacor Distinctive Service line. Whenever you call, have
the model and serial number of the appliance ready. See
diagram below for product data label location.
Dacor Customer Service
Phone: (800) 793-0093 ex. 2813 (U.S.A. and Canada)
Monday — Friday 6:00
A
.
M
.
to 5:00
P
.
M
.
PST
Web site: www.dacor.com
Dacor Distinctive Service
(for repairs under warranty only)
Phone: (800) 793-0093 ex. 2822 (U.S.A. and Canada)
Monday — Friday 6:00
A
.
M
.
to 5:00
P
.
M
.
PST
All specifications subject to change without notice. Dacor assumes no liability for changes to specifications.
© 2012 Dacor, all rights reserved.
Product data label
(view through right
side of grate with
flashlight)
Model Identification
DR30G
I
FS/NG/H
SIZE (inches)
TRIM TYPE
I = Island trim
No character = Freestanding
HANDLE TYPE
F = Flush handle, integrated in door
No character = Handle mounted on
outside of door
GAS TYPE
NG = Natural gas
LP = Liquid petroleum (propane)
ALTITUDE
H = Equipped for high altitude operation,
4000 ft. (1219 m) and up
No character = Equipped for low altitude
operation
Important Safety Instructions
.....................................................
1
Important Information About Safety Instructions
............................
1
General Safety Precautions
...........................................................
2
Installation Specifications
...........................................................
4
Product Dimensions
.......................................................................
4
Electrical Power Supply Requirements
..........................................
5
Gas Supply Requirements
.............................................................
5
Cabinet Layout
...............................................................................
6
Gas and Electrical Locations
..........................................................
8
Installation Instructions
...............................................................
8
Verifying the Package Contents
.....................................................
8
Parts List
........................................................................................
8
Installing the Anti-Tip Bracket
.........................................................
8
Backguard Kit Installation
.............................................................
10
Rear Trim Piece Installation
.........................................................
10
Adjust the Range Height
..............................................................
11
Door Removal
..............................................................................
11
Gas Connection
............................................................................
12
Moving the Range to Final Location
............................................
13
Re-Installing the Door
...................................................................
13
Cooktop Assembly
........................................................................
14
Verifying Proper Operation
...........................................................
15
Installation Checklist
.....................................................................
16