Dacor ETT365-2 Installation Instructions - Page 6
Planning the Location, Cabinet Layout - and model
 |
View all Dacor ETT365-2 manuals
Add to My Manuals
Save this manual to your list of manuals |
Page 6 highlights
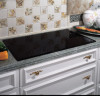
Installation Specifications warning • IMPORTANT: Observe all governing codes and ordinances during planning and installation. Contact your local building department for further information. • To reduce the risk of a fire hazard, all minimum/maximum clearances shown must be met or exceeded. • When installing model ETT365-2 or METB365-1 and the bottom of the chassis is to be enclosed wall to wall, you must install ventilation duct kit ATD323. See the duct installation instructions for cutout requirements. Planning the Location • Dacor recommends installing a non-combustible material on the rear wall behind the cooktop. • Carefully check the location where the cooktop is to be installed. It should be placed for convenient access. • To reduce the risk of personal injury caused by reaching over a hot appliance, cabinet storage space located directly above the cooktop should be avoided. • Make certain that electrical power meeting the specifications on page 3 can be provided in the selected location. Verify that the electrical location is permitted by local building codes. Locate the junction box within reach of the included 48 inch long (1219 mm) cooktop power conduit attached at the bottom right rear of the chassis. Do not lengthen the wiring. Make sure the underside of the cooktop and the junction box are accessible for inspection and service. Cabinet Layout Under Counter Clearance • Allow a minimum of six(6) inches (152 mm) clearance between the base of the glass cooktop frame and any combustible surface below, including the upper edge of drawers below the cooktop. Proper under-cabinet clearance is also required for the cooktop hold down brackets. 6" (152 mm) Min. clearance to combustible A surfaces Cooktop Models ETT304-1, MET304 ETT365-2, METB365-1 A - Minimum Under Counter Clearance (Width) 30 1/2" (775 mm) 36 1/2" (927 mm) Under Counter Clearance - All Installations Ventilation To reduce the risk of personal injury and to reduce accumulated smoke in the room, Dacor strongly recommends installing a vent hood or raised vent. Install the vent hood or raised vent according to the accompanying installation instructions. A vent hood should cover the entire cooking surface below it. If installing the cooktop with a raised vent, install only the following approved Dacor model numbers: Cooktop Models ETT304-1 MET304 Approved Raised Vent Models ERV30, PRV30 or RV30 ETT365-2 METB365-1 ERV36, PRV36 or RV36 Raised vent installation must allow room for the stiffener bar on the back of the raised vent chassis. See below. 3/8" Min. (10 mm) flat countertop overhang required behind cutout Countertop Stiffener ETT or MET series cooktop Cabinet face 3/8" Min. (10 mm) space behind raised vent chassis to clear stiffener ERV or PRV series raised vent: Check raised vent dimensions/specifications to determine proper fit Floor Side View: Cooktop and ERV/PRV Series Raised Vent 5/8" Min. (16 mm) flat countertop overhang required behind cutout Countertop Stiffener ETT or MET series cooktop Cabinet face 5/8" Min. (16 mm) space behind raised vent chassis to clear stiffener RV series raised vent: Check raised vent dimensions/specifications to determine proper fit Floor Side View: Cooktop and RV Series Raised Vent 4
-
 1
1 -
 2
2 -
 3
3 -
 4
4 -
 5
5 -
 6
6 -
 7
7 -
 8
8 -
 9
9 -
 10
10 -
 11
11 -
 12
12
 |
 |
