Dacor HWO230 Installation Instruction - Wall Oven - Page 6
Planning the Installation
 |
View all Dacor HWO230 manuals
Add to My Manuals
Save this manual to your list of manuals |
Page 6 highlights
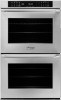
INSTALLATION SPECIFICATIONS Planning the Installation WARNING Observe governing codes and ordinances during planning/installation. Contact your local building department for details. IMPORTANT • Place the junction box so the oven may be easily disconnected if it must be removed for service. • Ensure the oven is installed fully level, or it may deliver poor/inconsistent baking results. • Ensure the oven is easily accessible. Verify that electrical power, meeting the specifications on pg. 4, is available to the intended location. • Install the junction box as shown on Pgs 5-6. • Install the junction box so the oven can be removed from the cutout without being disconnected. • Plan the installation so all minimum clearances are met or exceeded. Dimensions shown provide minimum clearances unless otherwise noted. Ensure proper clearance is provided for the oven door. (See Product Dimensions.) • Cabinet cutout dimensions must be followed. The specified minimum cabinet depth/width must be provided. The cabinet depth/width must completely enclose the recessed portion of the oven. • All contact surfaces between oven and cabinet must be solid and level. • Provide a support platform within the cabinet for the oven, which must be installed level and straight. The top edge of the platform must be flush with the cutout at the front of the cabinet. There is no way to level the oven after installation. 3/4" (1.9 cm) plywood is recommended. Cabinet Dimensions Cabinet tolerances: +1/16 (1.6 mm), -0, unless otherwise stated Model (N) Min. Cabinet Width (P) Cutout Width HWO127 27" (68.6 cm) 25 5/8" (65.1 cm) min. (recommended) or 26 1/8" (66.4 cm) max. HWO130 30" (76.2 cm) 28 5/8" (72.7 cm) min. (recommended) or 29 1/8" (74.0 cm) max. HWO227 27" (68.6 cm) 25 5/8" (65.1 cm) min. (recommended) or 26 1/8" (66.4 cm) max. HWO230 30" (76.2 cm) 28 5/8" (72.7 cm) min. (recommended) or 29 1/8" (74.0 cm) max. Minimum interior cabinet depth: 24" (61.0 cm) (R) Cutout Height 27" (68.6 cm) 50" (127.0 cm) Cutout Dimensions Single Wall Oven (under-counter install) Cabinet tolerances: +1/16 (1.6 mm), -0, unless otherwise stated 4
-
 1
1 -
 2
2 -
 3
3 -
 4
4 -
 5
5 -
 6
6 -
 7
7 -
 8
8 -
 9
9 -
 10
10 -
 11
11 -
 12
12 -
13
-
14
-
15
-
16
-
17
-
18
-
19
-
20
-
21
-
22
-
23
-
24
 |
 |
