Dacor HWO230 Installation Instruction - Wall Oven - Page 8
Verifying Package Contents, Removing An Oven Door, Making the Electrical Connection
 |
View all Dacor HWO230 manuals
Add to My Manuals
Save this manual to your list of manuals |
Page 8 highlights
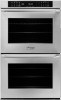
INSTALLATION INSTRUCTIONS Verifying Package Contents These items should come with the oven. Contact your dealer immediately about missing/damaged items. Do not install a incomplete/damaged oven. • Installation Instructions, User Manual • Mounting screws (wood, #6 x 3/4, Dacor PN 83331; 4 for single oven, 6 for double oven) • Standard oven racks (single oven: 1; double oven: 2) • GlideRack™ oven rack (single oven: 2, double oven: 4) • Broil grill and pan • Dacor Stainless Steel Cleaner (s/s models only) • Meat probe Before starting installation, gather all needed items. Gripping point Gripping point Steps 3, 4 4. Grasping with both hands just below the handle, lift the door away from the oven. Making the Electrical Connection Removing An Oven Door Remove the door(s) so the oven is lighter and easier to lift. WARNING • Do not detach the hinge catches after removing the door; the springs could pop free and cause injury. • Do not lift or carry the door by its handle. • (Double ovens) Remove the bottom door first to reduce the risk of damage. 1. Open the door fully. Steps 1, 2 Catch WARNING-SHOCK HAZARD • If the electrical service does not meet the specifications on pg. 3, postpone the installation, and have a licensed electrician the install the proper wiring. • Be sure to remove power to the oven before installation. • Do not turn on power to the oven until it is properly grounded per these instructions. • The installer must connect the oven ground terminal (lead) to a metal, grounded, permanent wiring system or grounding conductor. • Do not use an extension cord. • Do not install a fuse in the neutral or ground circuit. • Connect the oven to the power supply with copper wire only. IMPORTANT Leave slack in the conduit so the oven can be slid forward for service without disconnection. Retaining arm 2. (Each hinge) With a pair of needle-nose pliers and slotted screwdriver, rotate the catch over the retaining arm. 3. Lift the oven door to about a 15° angle from vertical. NOTE The leads from the oven conduit may be a smaller gauge than the wiring of the dedicated supply circuit but are compatible with household wiring under National Electric Code jurisdiction and/or the local inspection authority. 1. Turn off power to the circuit to which the oven will be connected at the circuit-breaker panel or fuse box. 2. Position the oven directly in front of the cabinet cutout. 3. Feed the appliance conduit into the junction box and attach it using a UL-approved strain relief. 4. Per local code, connect to one of these systems (see Pgs. 8, 9): • 4-wire electrical system • 3-wire electrical system • 3-wire electrical system w/external ground. 6
-
 1
1 -
2
-
 3
3 -
 4
4 -
 5
5 -
 6
6 -
 7
7 -
 8
8 -
 9
9 -
 10
10 -
 11
11 -
 12
12 -
 13
13 -
14
-
15
-
16
-
17
-
18
-
19
-
20
-
21
-
22
-
23
-
24
 |
 |
